Painting & Decals
Video Restoration
IBM made the 701 line of ThinkPads during the era when they used rubberized soft-touch paint. Unfortunately, the vast majority of this line and other ThinkPads were plagued with “melting” or sticky cases caused by the deteriorating paint. The first one I encountered was a portable PS/2 from 1992 - the same year the first ThinkPads were introduced.
Sometimes the issues stop at the cosmetic, making them look scratched and beat up. Other times the paint can work its way into the components themselves, causing real problems.
The following is the process I use to restore these machines, and while the decals I’ve produced are specific to the 701C/CS line, you can apply the method to any ThinkPad.
This guide is detailed. The goal is to provide the best restoration possible using tools and materials that are either off-the-shelf or at least accessible to an average hobbyist.
Will I find someone who will custom-mix a rubberized soft-touch paint with subtle blue flecks like the originals? Maybe. But I’m not quite there.
Step 1: Disassembly & Prep


Every time you take apart a vintage computer, you risk breaking something. Plastic clips are the first to go, but I can’t count how many times I’ve broken parts of a case because I’m unknowingly applying pressure to one element while working on a completely different element. Awareness of where your hands are and where you’re applying pressure or using leverage is key to a clean disassembly.
It is also essential to perform a complete teardown. Remove every component, screw, spring, speaker, plastic shield, etc. The quality of the end product will be directly related to the time you take during prep. Some things will make sense to leave together (like things that are plastic welded). You’ll be able to mask these pieces off when painting. However, other things like removing speakers are critical because it’s next to impossible to mask out things like speaker grills.
I’ve taken the time to build and post a complete teardown guide on iFixit. Follow this guide first and continue once you have it disassembled.
If there are any parts you need to fix, save all the parts. The best time to repair is AFTER stripping the original paint off the main parts but before the final sanding and prepping for painting.
Before we go further, one other thing that I can’t emphasize enough is that if you’re going to deconstruct any vintage laptop for any reason, take the time to do all of the work; at a minimum clean every board, connector, screw, etc. Replace any component that could go critical and cause more damage, like CMOS batteries. The 701C has two - a sleep battery you can access through a door on the bottom and one soldered to the lower system board that you cannot get to unless you completely take it apart. Read my guide on critical fixes.
Step 2: Stripping & Sanding


I’ve tried quite a few methods to strip the rubberized paint off the case and this is not the ONLY way. This is the way I like the best taking into account the time, mess, risk of breakage or damaging the case.
Remove stickers and decals
Leaving stickers and details on the case will prohibit the agents you use from affecting the paint underneath. You don’t need to worry about getting ALL the residue off if the stickers tear, but you’re looking to get the vast majority.
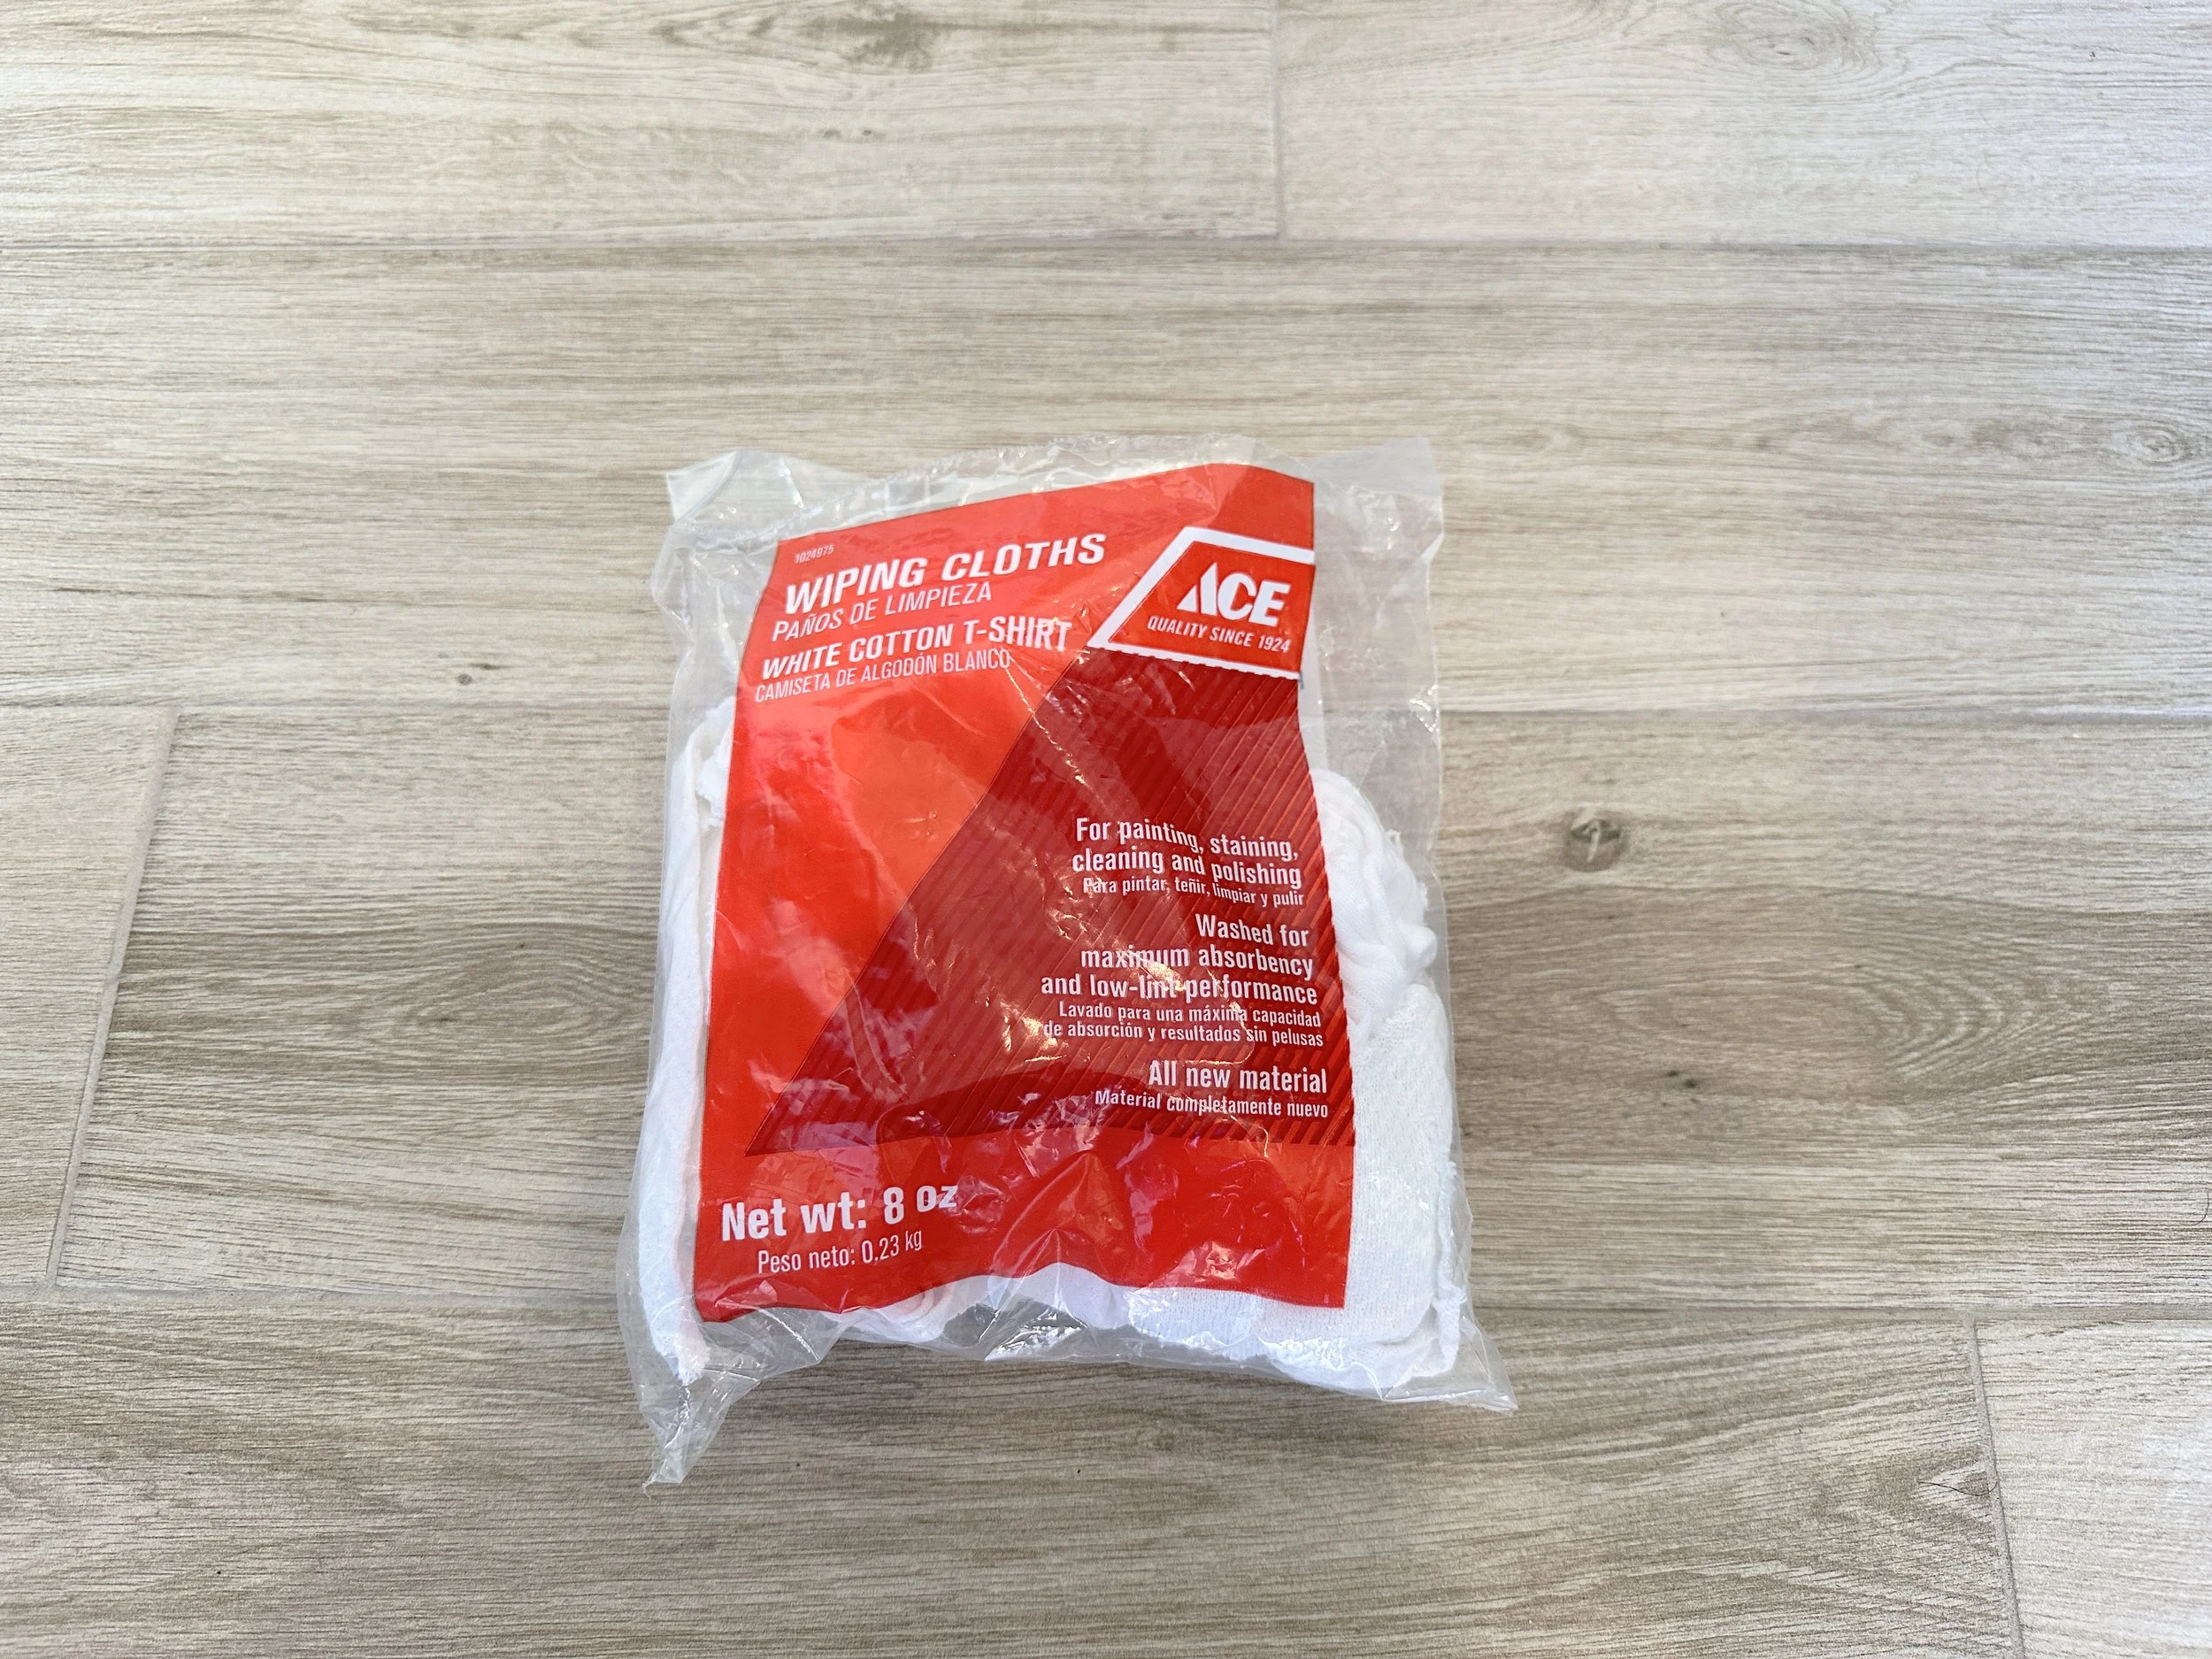
One technique I use for the stickers you want to preserve is denatured mineral spirits. Denatured mineral spirits do a great job of temporarily neutralizing the adhesive of a sticker. Once you remove the sticker, it will often retain enough adhesive to re-apply it without needing any other adhesive.
To do this, take a small amount of denatured mineral spirits and add them to a dispenser where you can control the amount you’re adding. Some use small mixing cups; I use a glass syringe I found on Amazon.
Note: almost any solvent will affect painted surfaces, but this is fine since we only want to preserve the stickers. Do not use a solvent to remove stickers from a painted surface if you don’t want to damage it.
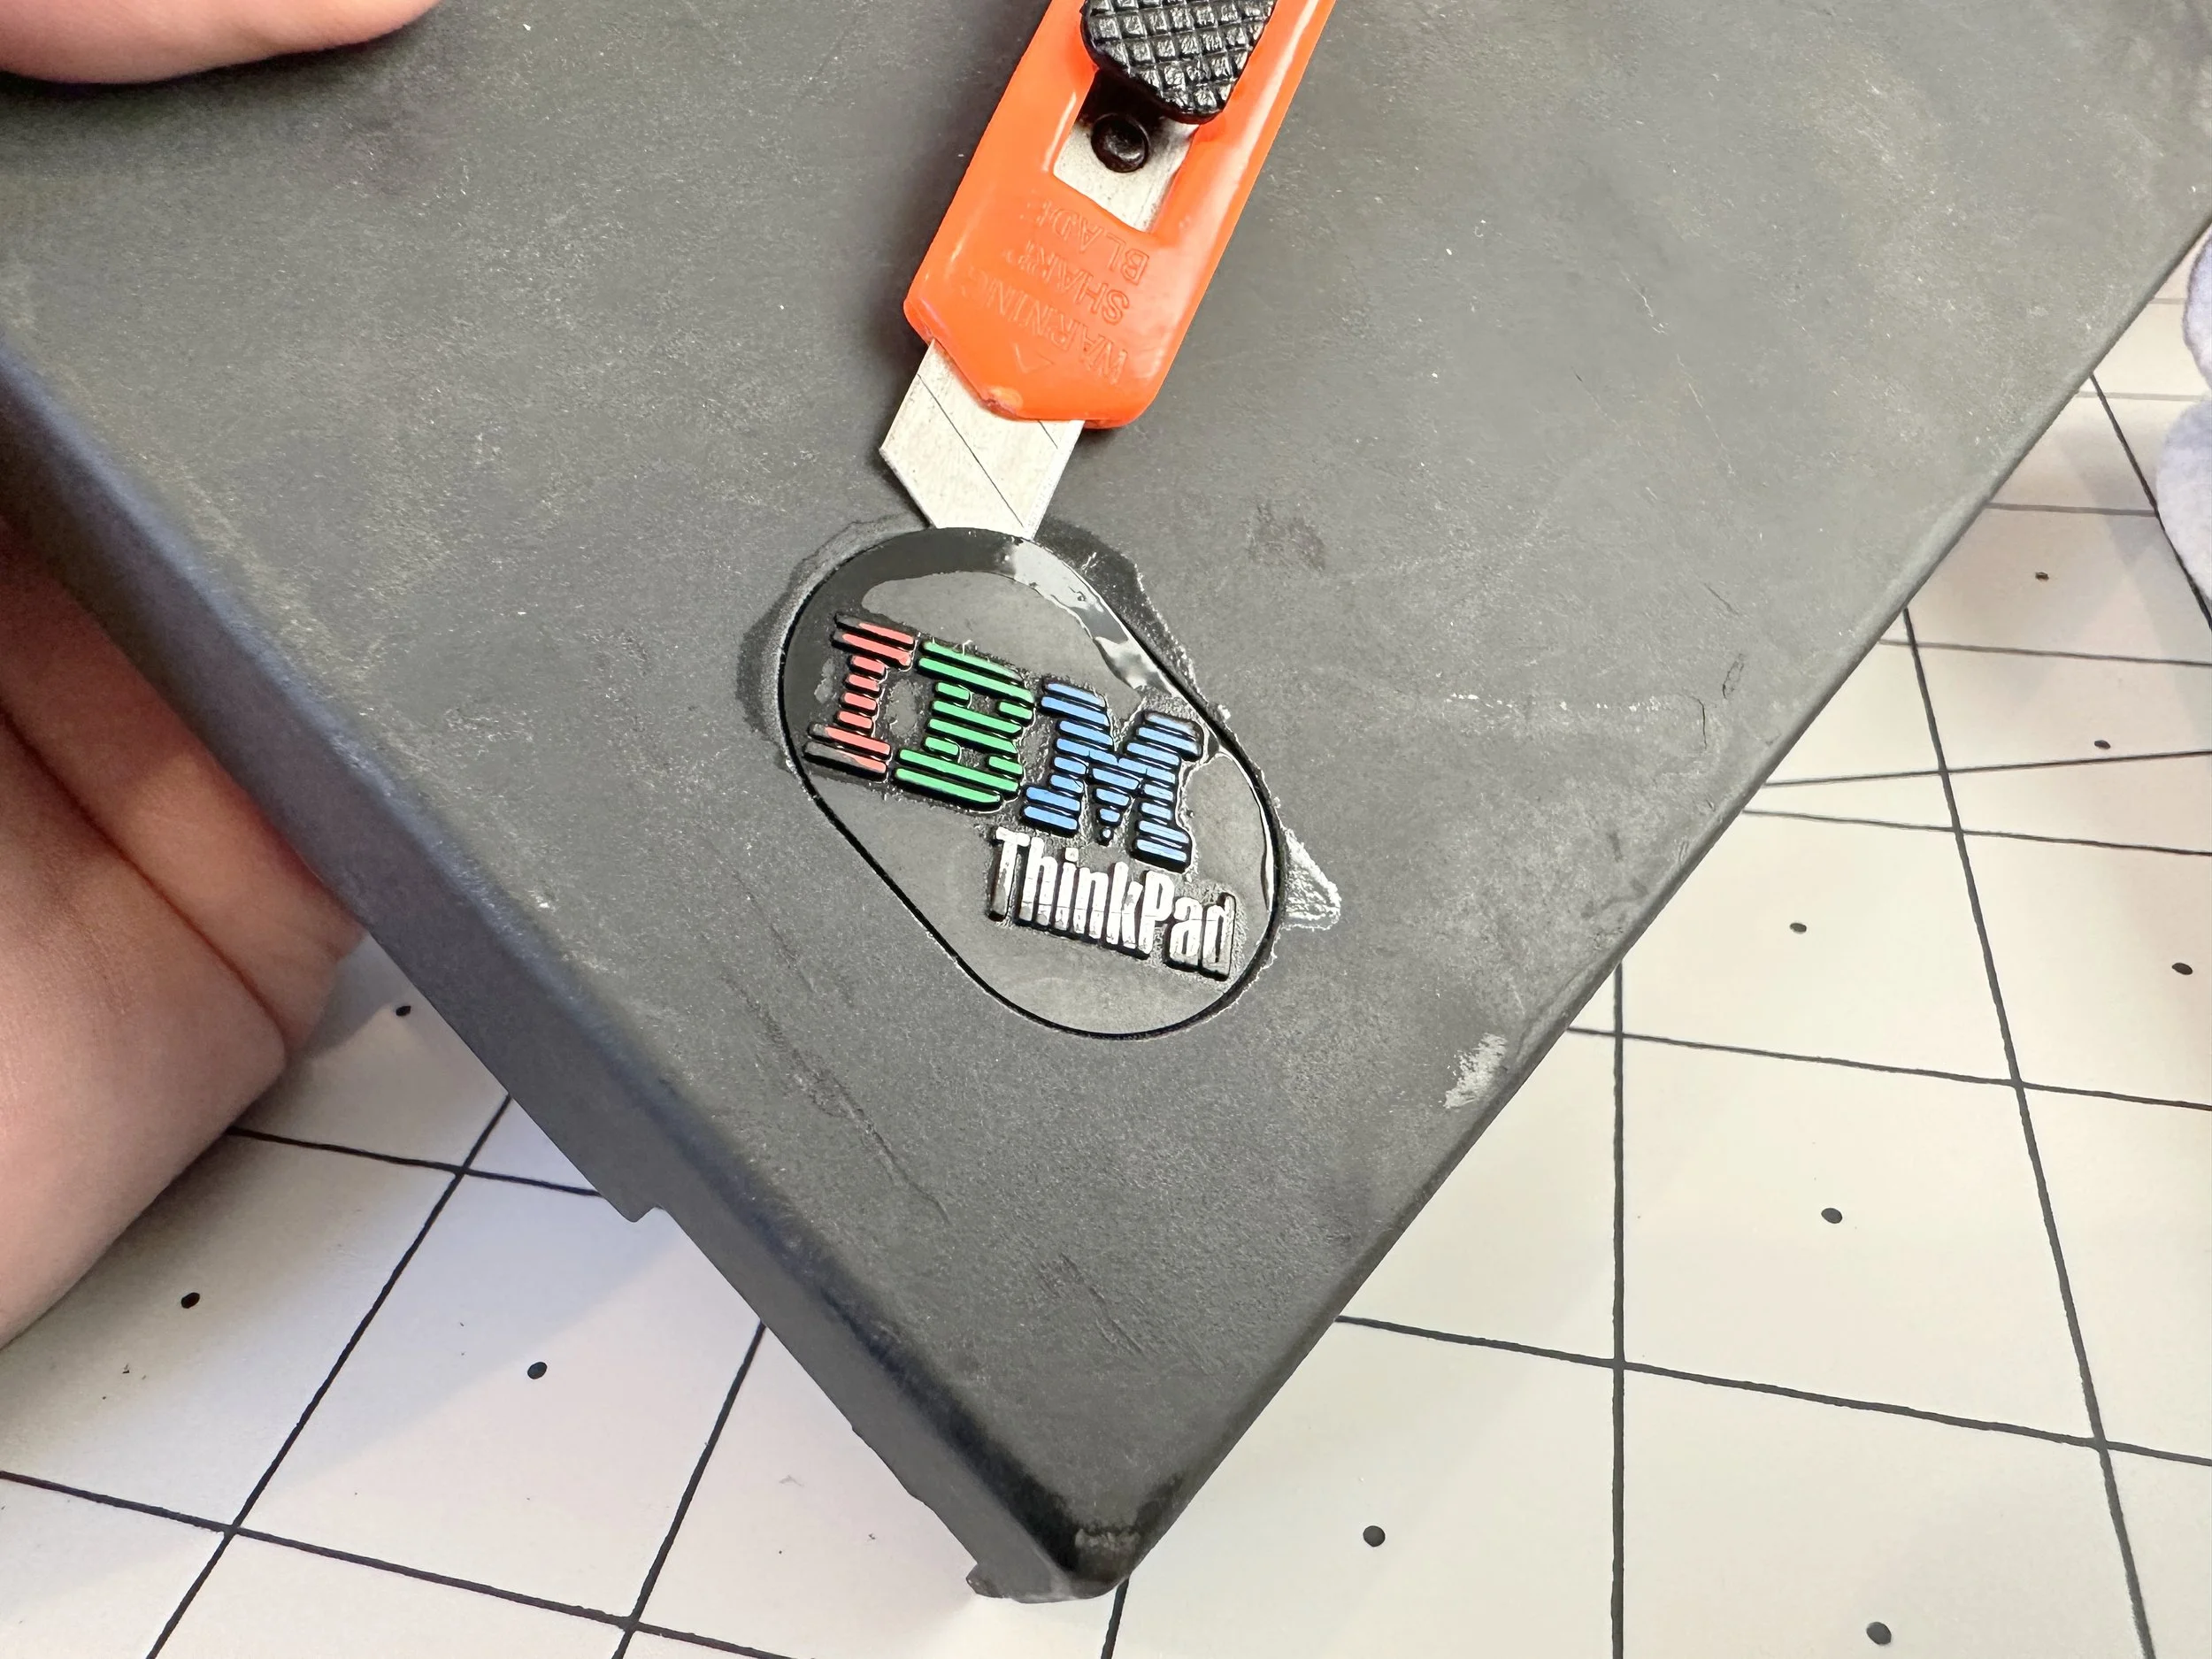


Using a hobby knife or a scalpel, slowly peel back one side of the sticker to expose a SMALL amount and start adding the mineral spirits. Be careful not to cut the label. I do this by inserting the tip of the knife and rotating counter-clockwise, using the back of the blade rather than the cutting edge.
If you do this in a way that works from the top down, you can use gravity to help the spirits get underneath the label as you peel it back. Once you no longer need the knife, you can use your fingers to help peel the label or a pair of tweezers. The label should come freely and without leaving residue. If it doesn’t, add more spirits and give it more time to do its work.
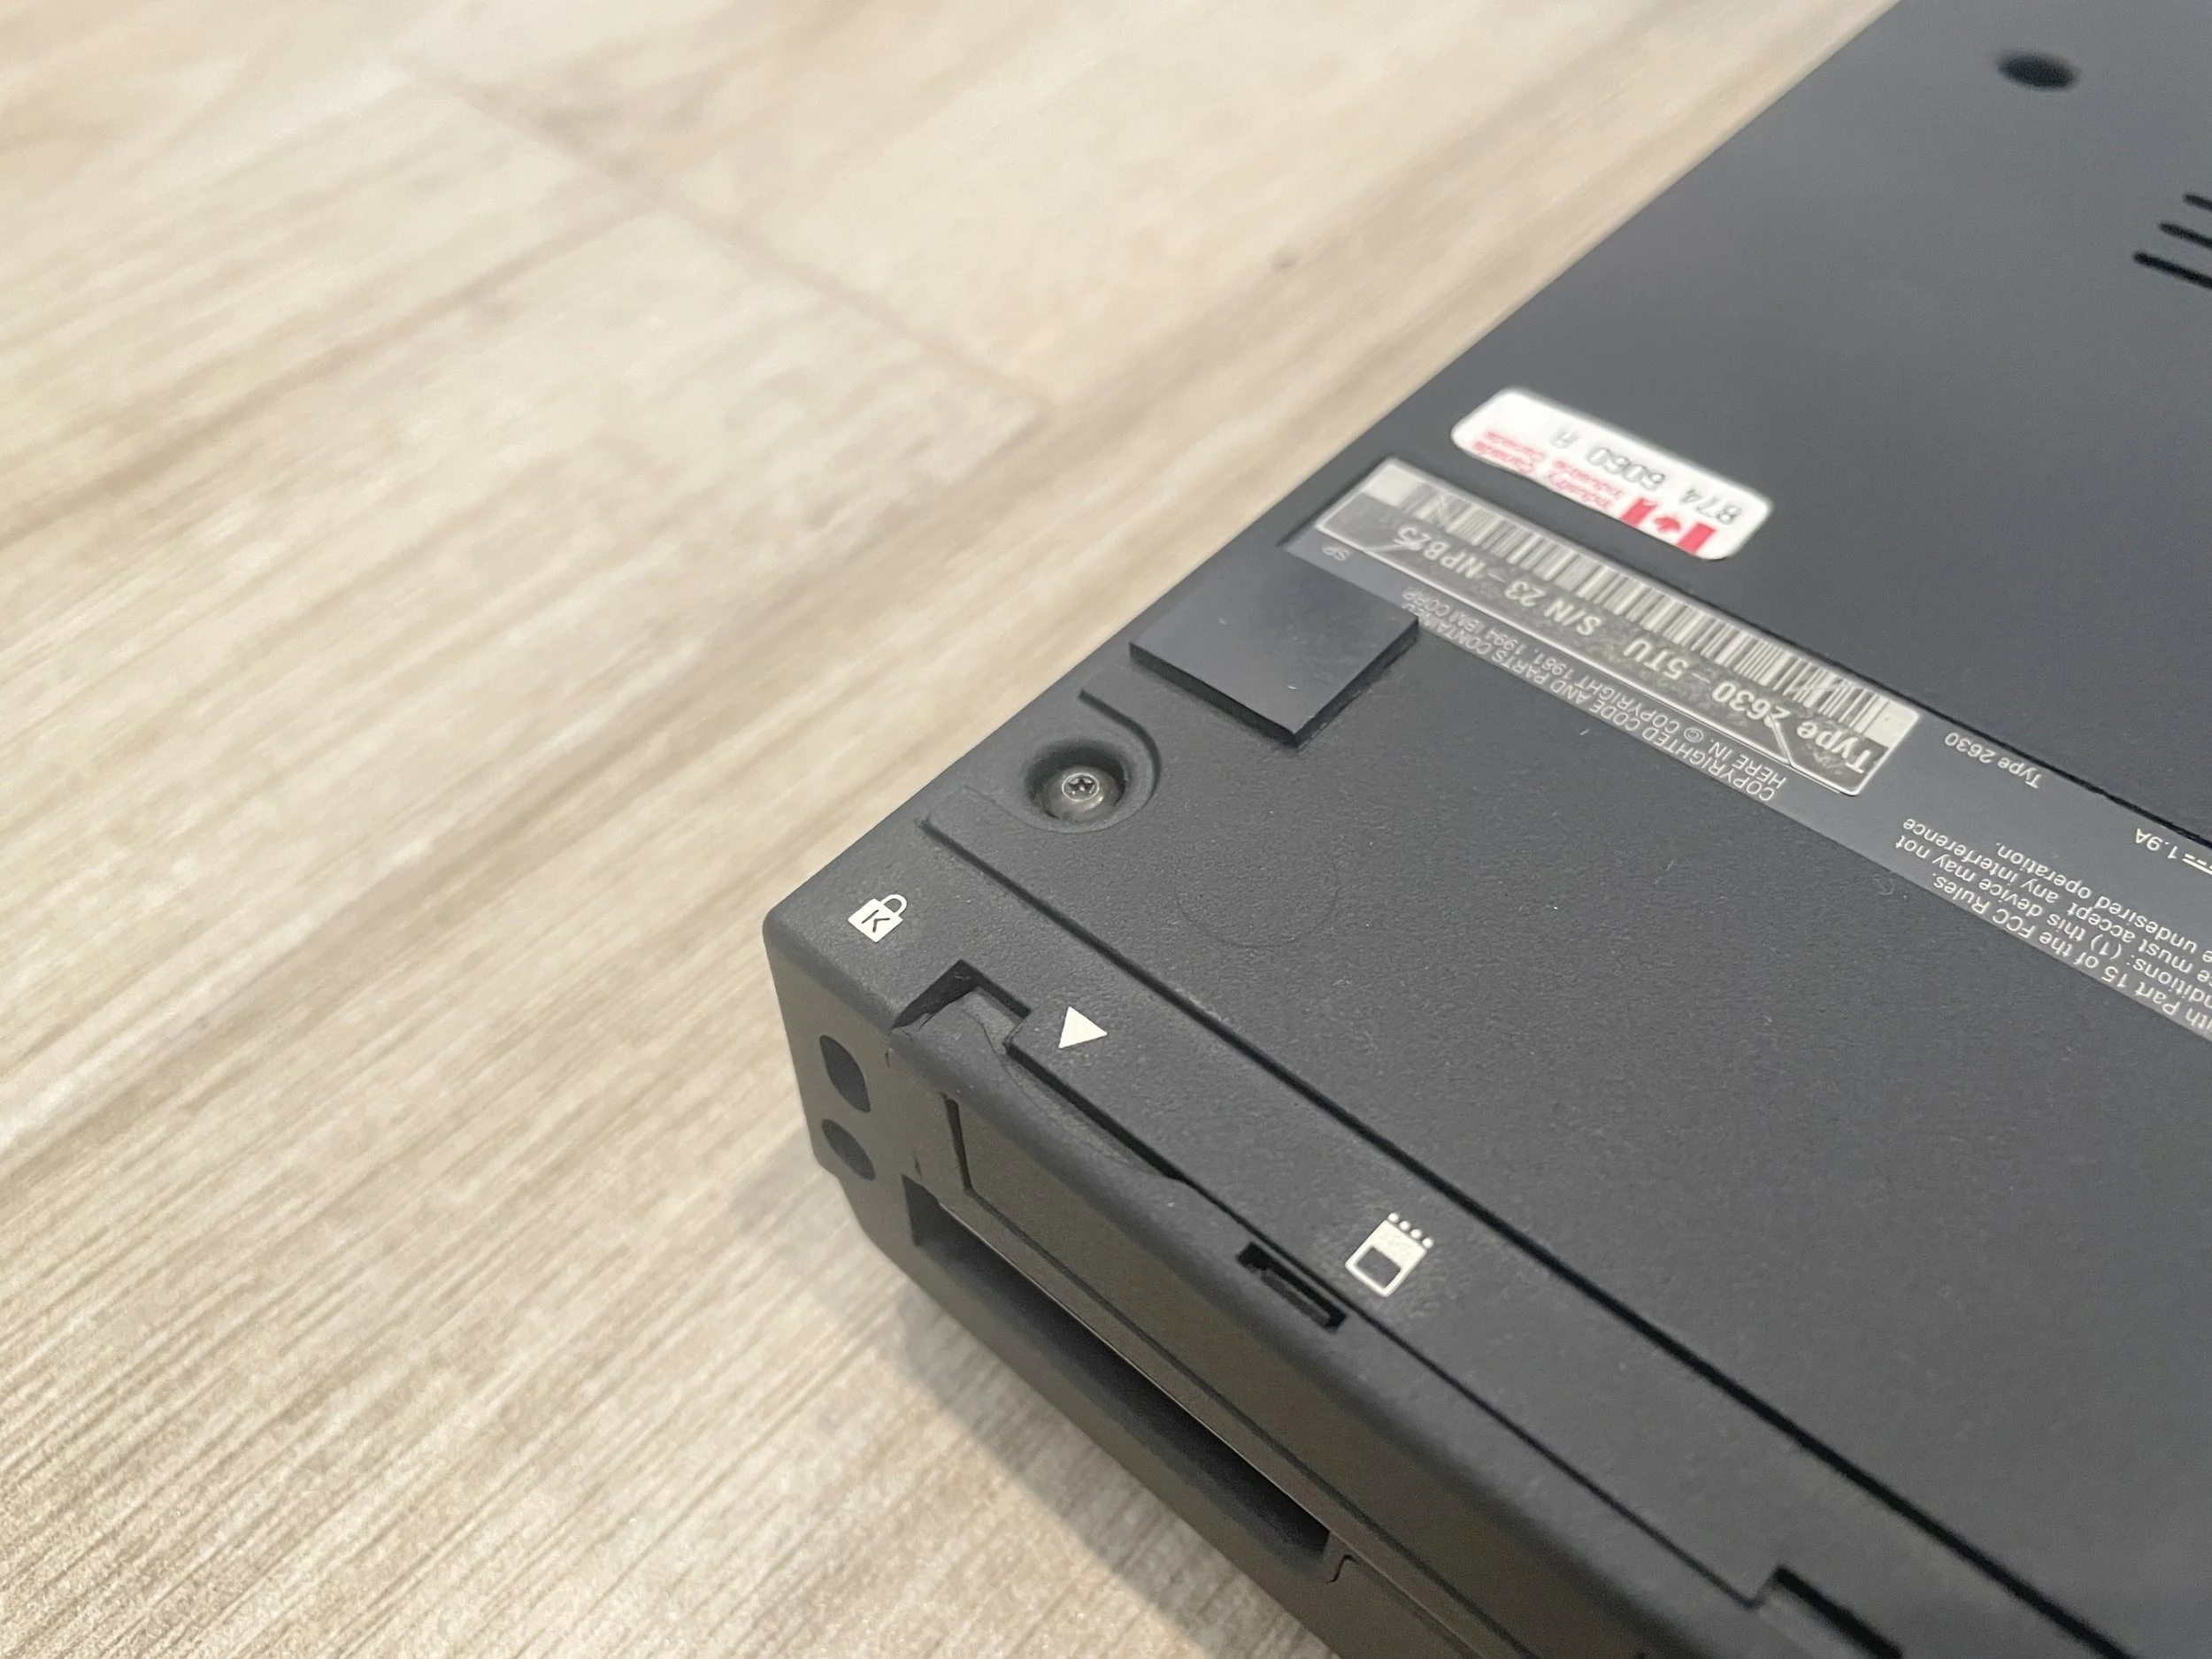
Here are the stock labels on the 701C that I make sure to remove:
The plastic case badge on the top lid
The plastic case badge on the keyboard cover
The Canadian regulatory sticker underneath the system information
I do not remove the system information sticker or the serial number unless it is damaged, and I need to have one reprinted - this one is easy to mask for painting.
Other ThinkPad lines may have Windows or Processor badges that you will need to remove. The 701 line did not come with any of these from the factory.
Some ThinkPads came with bright red/orange “HELP” stickers in the box that users could choose to apply. It’s up to you if you want to preserve them, but these did not come affixed from the factory.
Other ThinkPad lines also have the option for a custom badge located on the front right of the case. You can remove this badge using this technique; however, carefully peel it back as the sticker is made from metal. It can be difficult to bend back without some cosmetic defects if you bend it.
Once you have removed all the stickers and decals, it’s time to strip the paint.
Remove the top paint layer
Ive found the best way to get this done is to use a natural spray-paint remover, a plastic razor blade, some IPA and a lot of disposable painters cloths.

Start by separating the parts that need to be stripped - some small parts are NOT painted and may need to be cleaned. These parts are also ones that you SHOULD NOT repaint. Here are the parts that are painted and will need to be stripped:
Top case
Keyboard cover
Bottom case
Hard drive caddy (front)
Sleep battery cover
RAM cover
PCMCIA cover
Front battery cover (original or reproduction)
The pieces that do NOT need to be painted:
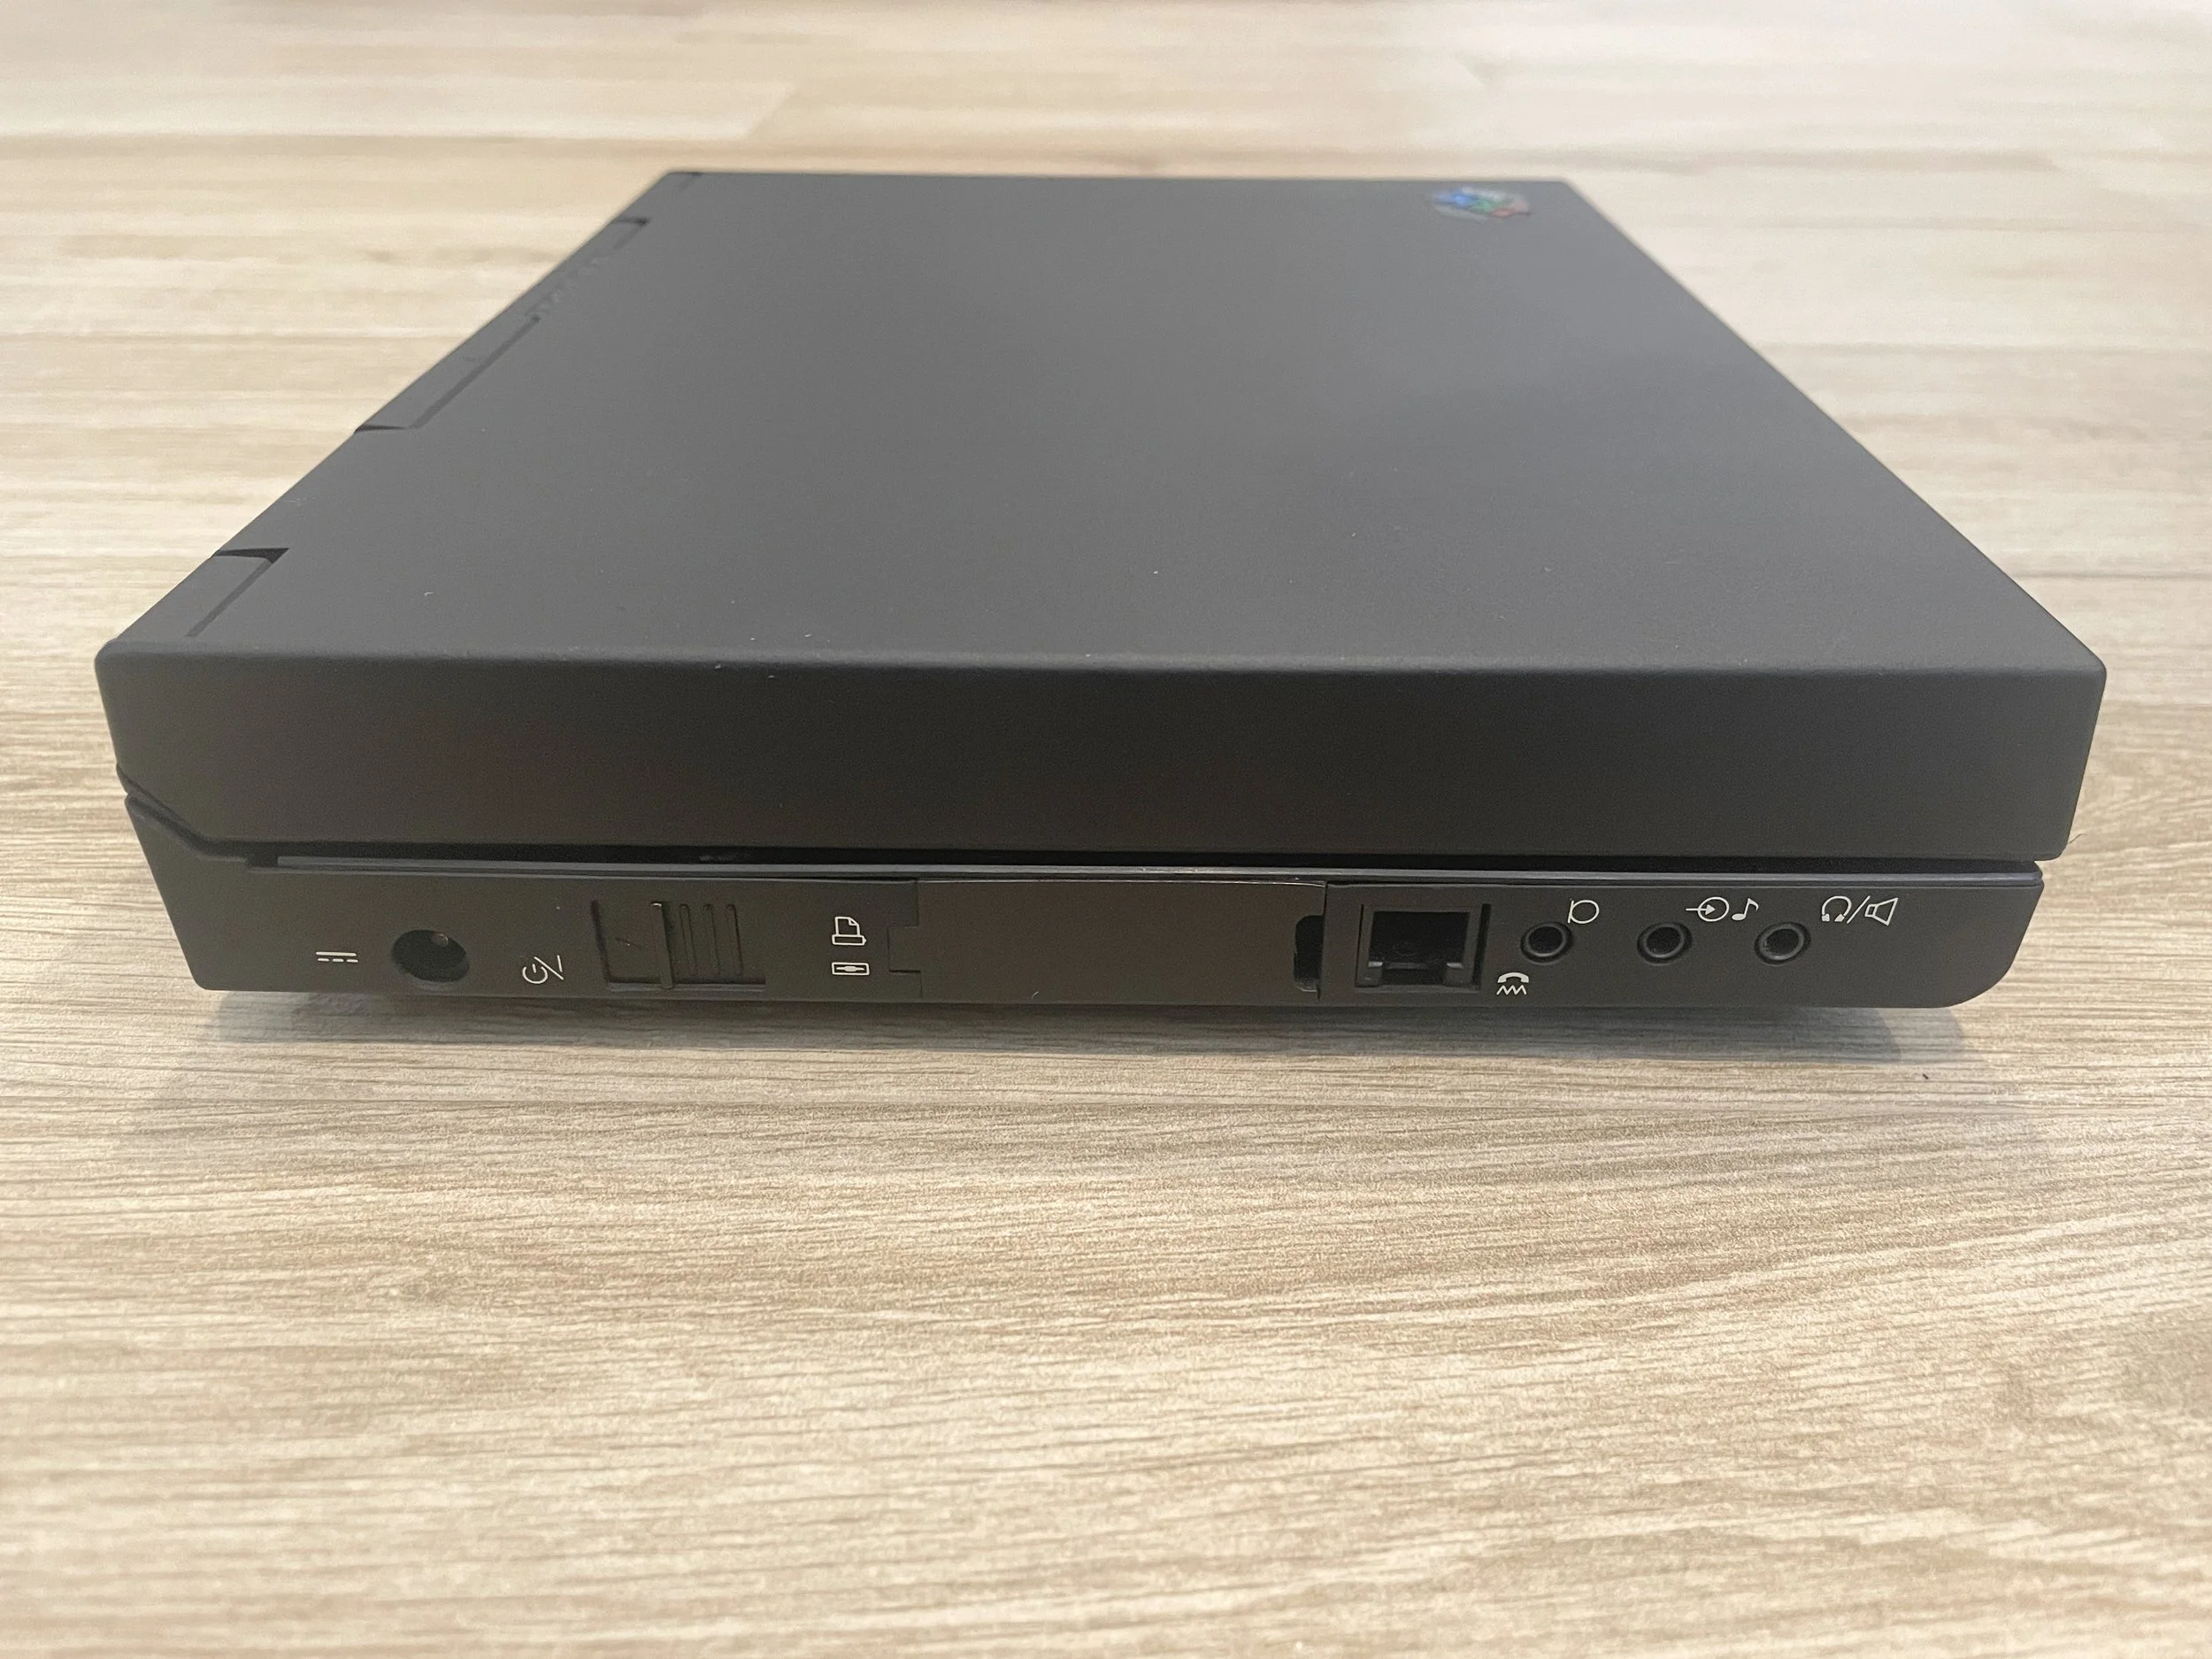
Rear port cover (sliding door)
Rubber FDD port cover
Battery lock switch
Note: You will want to mask up for the next step and do this outside or in a well-ventilated area!
Once you have your parts, you’ll want to start the process of removing the paint. The best way to do this is layer by layer. You’ll be repeating the following steps 3 to 4 times or until your part is smooth and the paint has been removed:
Spray until you completely cover the part with solvent. I use Motsenbocker’s Lift Off - Spray Paint and Graffiti Remover.
Wait 60 seconds.
For the first 2 or 3 times, use your plastic razor blade to scrape off the loosened paint. Keep in mind you’ll be doing this multiple times, so don’t feel the need to apply a ton of pressure. You’re good if you’re taking off one layer at a time.
When you’ve gotten the majority off, instead of using a plastic scraper, you can use a cloth to wipe off the excess paint for this step.
Spray the part with IPA and wipe down with a separate cloth (not the one you use for the paint remover)
Some parts have small details that require extra attention. Using a tool like a plastic razor blade to get in the corners makes it a bit easier.
“Done” at this phase will look pretty raw. Exposing the underlying plastic and drying it out with the IPA should result in a smooth but mottled look, as shown in the picture. You’ll also find that different parts will have different natural textures. For example, the texture of the top screen case is very different than the keyboard cover. The top screen case is much more grainy plastic with more imperfections that the original paint has covered up.


A semi-smooth texture and lack of patches of paint means we’re ready to move on to sanding.
Sanding out imperfections
If you’ve ever heard the term “climbing the sanding ladder,” that’s exactly what we’re doing. We start with lower grit sandpaper and use increasingly smaller grits. Since the case should be reasonably smooth at this point, we can start with a relatively high grit. At this point, we’re only looking to smooth out the slight imperfections that the paint will pick up.
Tip: If you find deep nicks, dents, or scratches in the plastic itself (not just the paint), you’ll be tempted to try to sand them out. I’m telling you right now to resist that urge. Scratches or imperfections in the paint can be sanded down; you should fill dents or deep scratches in the plastic itself, then sand it down to match the area around it (see the bodywork guide). If all you’re doing is trying to sand out a deep scratch, you’re removing material that will leave a smooth but noticeable uneven valley in your plastic that will become much more noticeable once it’s painted.
Start with a 220 and work your way to 400, then 600, and I even finish with 1000 grit. The paint itself is very thin. A basecoat will amplify imperfections, and the final clear coat will highlight them even further.
Depending on how particular you are (and I’m super particular), you may want to do a complete base coat, let it dry overnight, and then sand down and do it again the next day. A complete base coat will help to show where there are still imperfections or rough spots vs. discoloration from the smooth case.

How to know when to go back
At this point in the process, If your sandpaper is getting gummed up with thick black paint, it’s an indication that you’re not done with the previous step. Some black paint is normal as that’s what we’re trying to even out, but if your paper is black and gooey, time to go back. You may need to take another pass with some IPA, but if it’s thick, consider reapplying the spray-paint remover.
It’s essential to get into the tiny cracks of each part. You’ll want nice clean edges before you begin painting. This is the time to be detailed. The better the surface you achieve here, the better your finished paint job will look. Folding the sandpaper in half and using the edge will give it a bit of structural integrity while not resorting to things like files that can destroy plastic quickly.
After sanding, take the opportunity to fix any cracks, broken standoffs, etc. You can reference the guide dedicated to bodywork.
You're ready for masking when you have prepped all the parts.
Step 3: Masking
The goal of masking is to make sure we don’t paint any areas we don’t intend to. The difference between a good job and a great job is ensuring that no masking lines are visible once you put everything back together.
Choosing the right masking tape
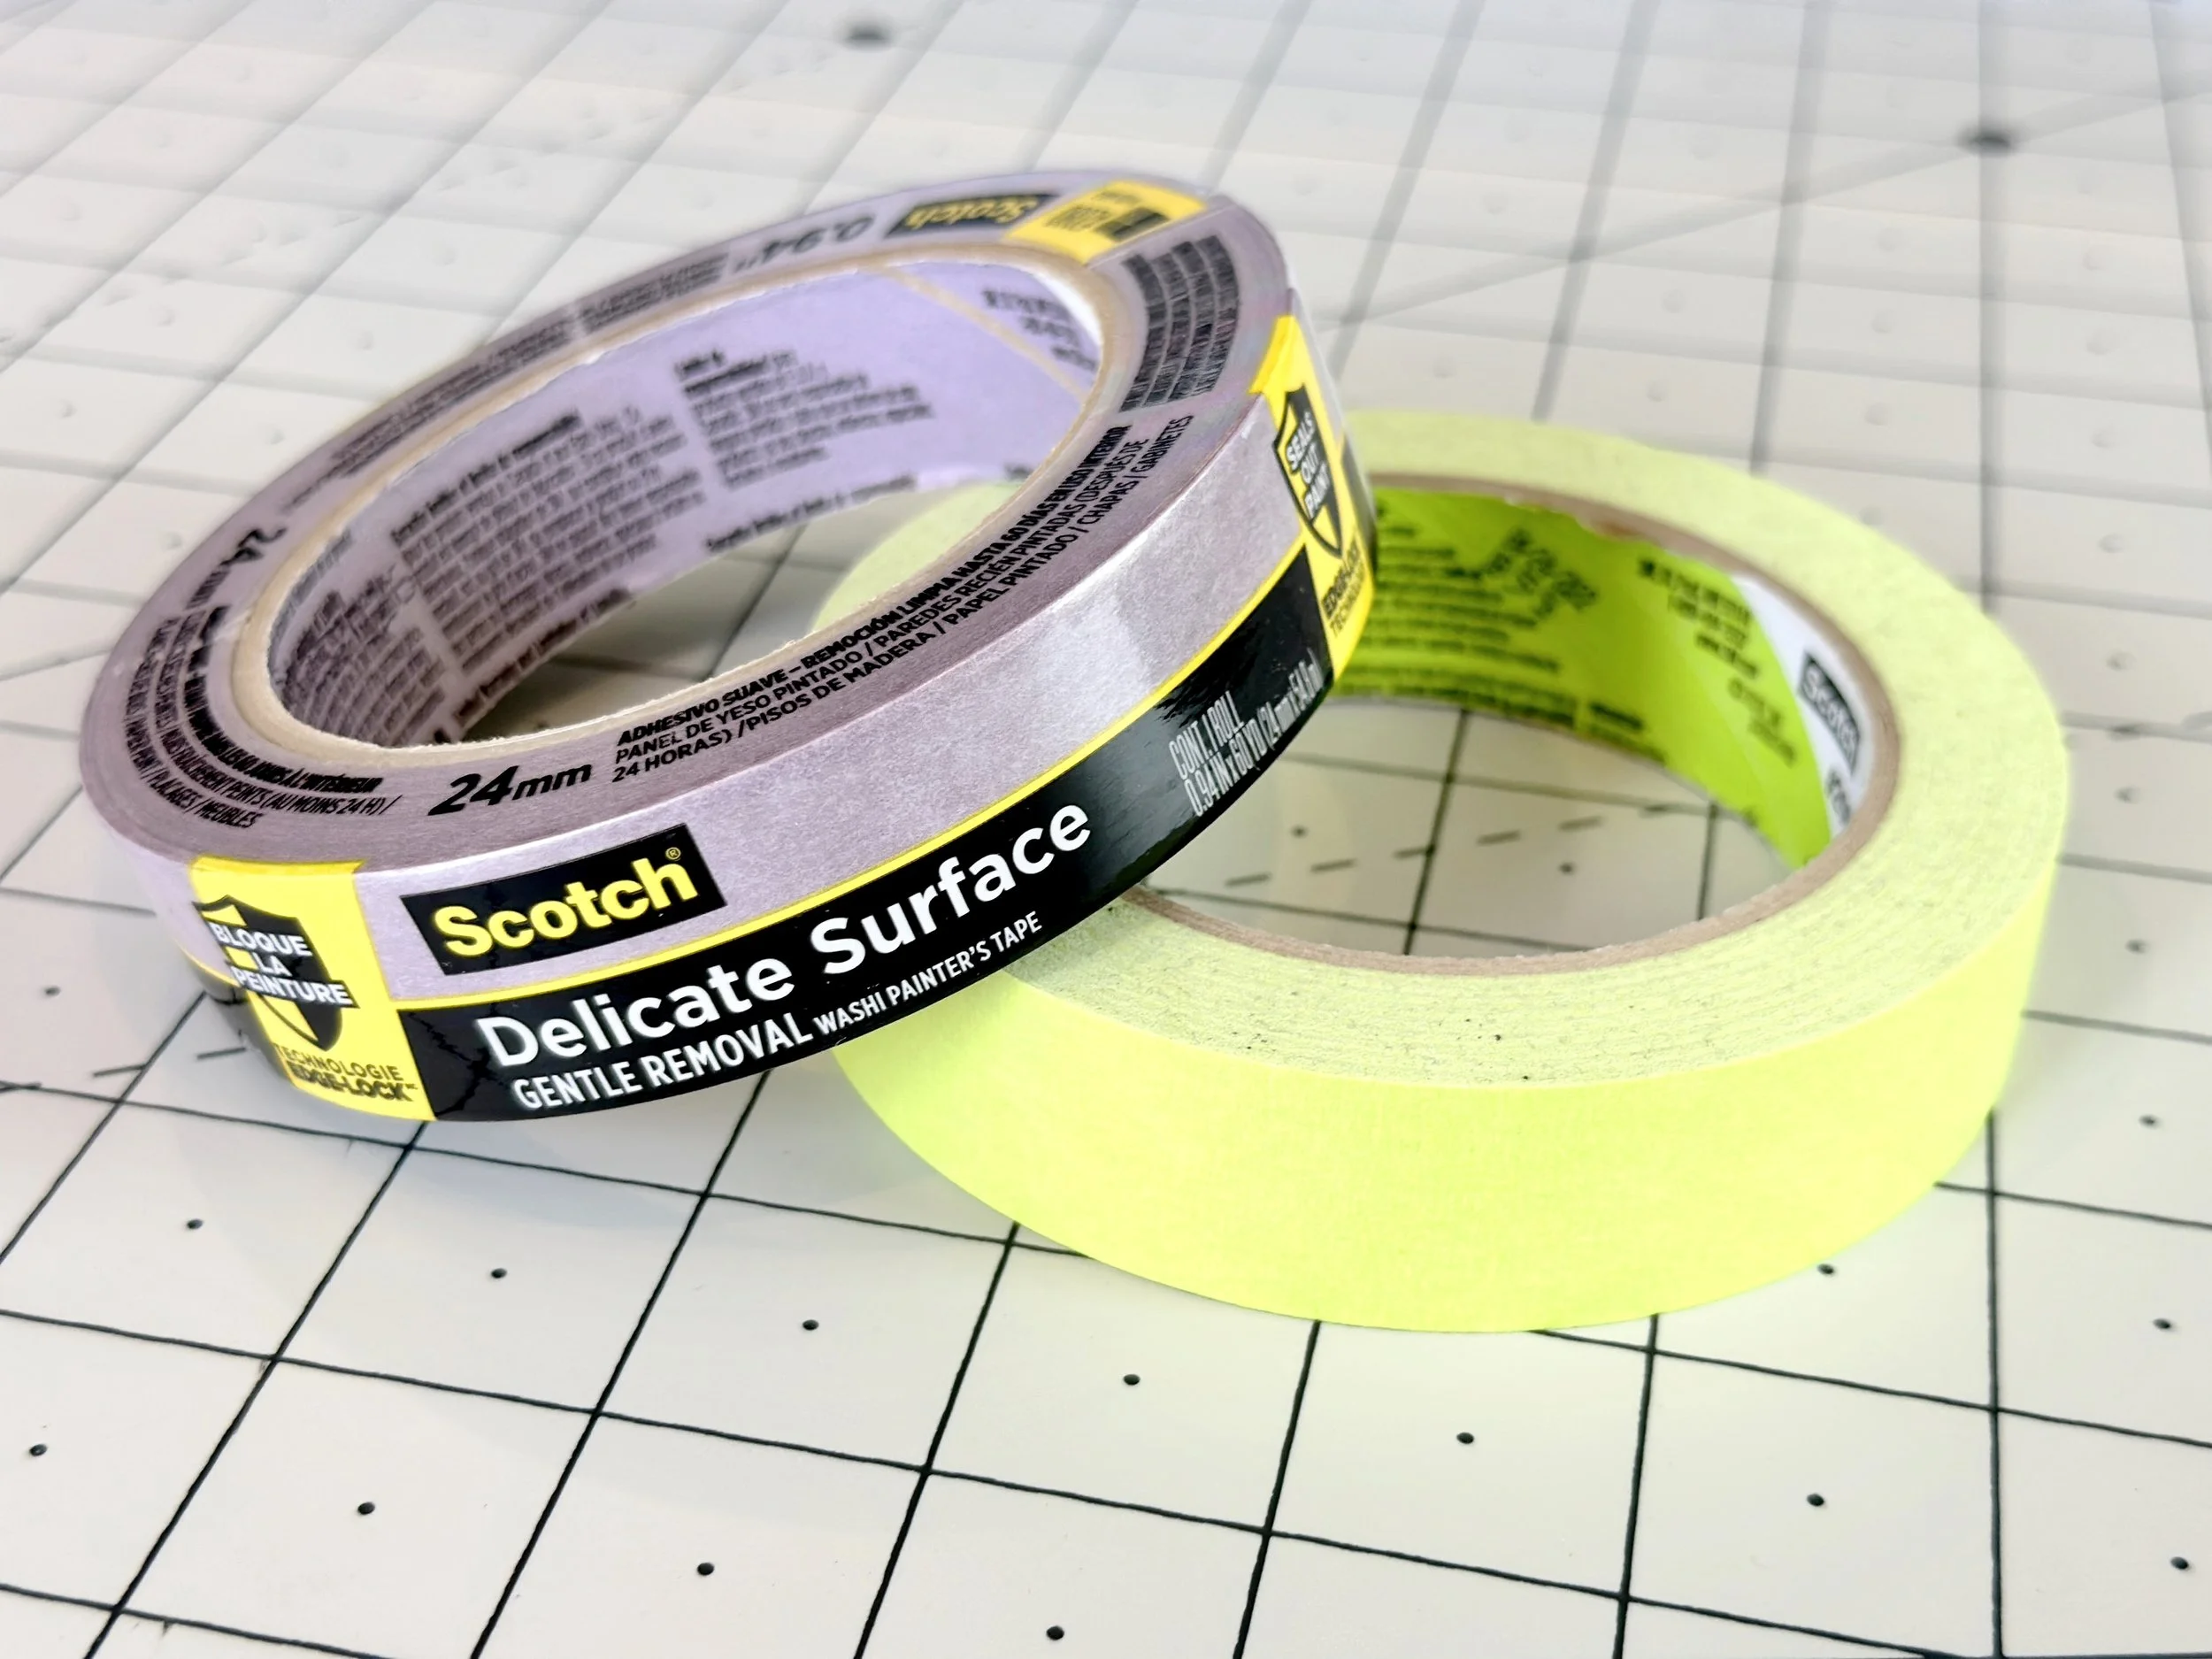
The right tool for job
There are different types of masking tape. A good tape will act as a seal to prevent the paint from getting underneath while protecting the part being masked from damage or leaving behind residue after removing it. The type of tape you pick should is based on the surface of what you’re masking.
If you are masking a painted surface, for example, retouching areas of an already painted part, you’ll want to use tape made for delicate surfaces. The tape will have a lighter “tack” but a minimal chance of pulling up any paint or leaving behind residue that you’ll have to clean up - and that cleaning may damage the part.
If you’re masking something like the parts we’re working with - with lots of small detailed areas -you’ll want a tape that has a stronger tack. This is so you can make sure the tape does an excellent job of holding, even if it’s only sitting on a small surface area.
So, if you’re doing some repair work and are concerned about the surface, use a tape made for delicate surfaces. If you’re masking out a case after stripping the whole thing, go for one made for rugged surfaces with a strong tack. Below are the brands I use.
Masking small areas and straight lines


When you mask sharp curves in tight areas, it’s easier to use multiple smaller pieces of tape rather than trying to jam one large piece of tape into numerous small areas. The beauty of masking a part is that it’s an additive process. As long as the tape has a good seal, multiple layers are not an issue.
For masking edges and straight lines, the easiest thing to do is use the edge of the tape itself rather than trimming it afterwards. Always try to avoid tearing the tape off. Use a hobby knife or scalpel to cut clean edges, and always try to prevent cutting the tape while it’s on the part itself. Even if the area you are cutting won’t be visible, it’s easy to slip and nick an area that you’ll have to repair later. There are exceptions to this, as we’ll go through below, but the less you can do, the better.
If you cut a piece that’s too small - adding another on top that overlaps the first is much easier than trying to cut a piece of tape to size.
If you cut a piece that’s too large - take it off the part and cut it down to size on a cutting mat away from the part. You can always add another if it's too small. The tack on masking tape is forgiving; unless there is a lot of dust or debris where you’re masking, you should be able to peel off the piece and re-apply it without issue.
Surface masking for recessed areas like case badges
For case badges, I always mask off the recessed areas. Of course, you may choose to paint and then add the badge on top, but sometimes the spaces are recessed only enough to hide the edges of the badge, so even a few thin layers of paint will affect the look.
Having said that, when masking recessed areas, the priority is to ensure you won’t see any paint lines when the part is re-assembled. So this means that a bit of paint inside the recessed area is better than masking off too much and having the unpainted area visible after re-applying the badge.
Start by adding the tape to the areas, ensuring there is a lot of overlap. Then, use a pointed plastic spudger to “carve” out the outline of the area in the tape. Don’t feel like you have the cut out the tape using the spudger, but we’re looking at making a groove our knife can follow.
Once you’re satisfied with it, remove the tape and lay it on a cutting mat. Use a hobby knife or scalpel to cut out the piece that will fit in the recessed area. Follow the inside of the line you’ve made with the spudger. This ensures that the piece will be just a tad smaller than is needed. It also means your cut doesn’t have to be 100% perfect because some paint will be underneath the badge or sticker.
Re-apply the cut piece into the recessed area and use the flat end of the spudger to press all of the edges down firmly. You can also go back over the edge with the pointed end and gently move the mask areas away from the edge.
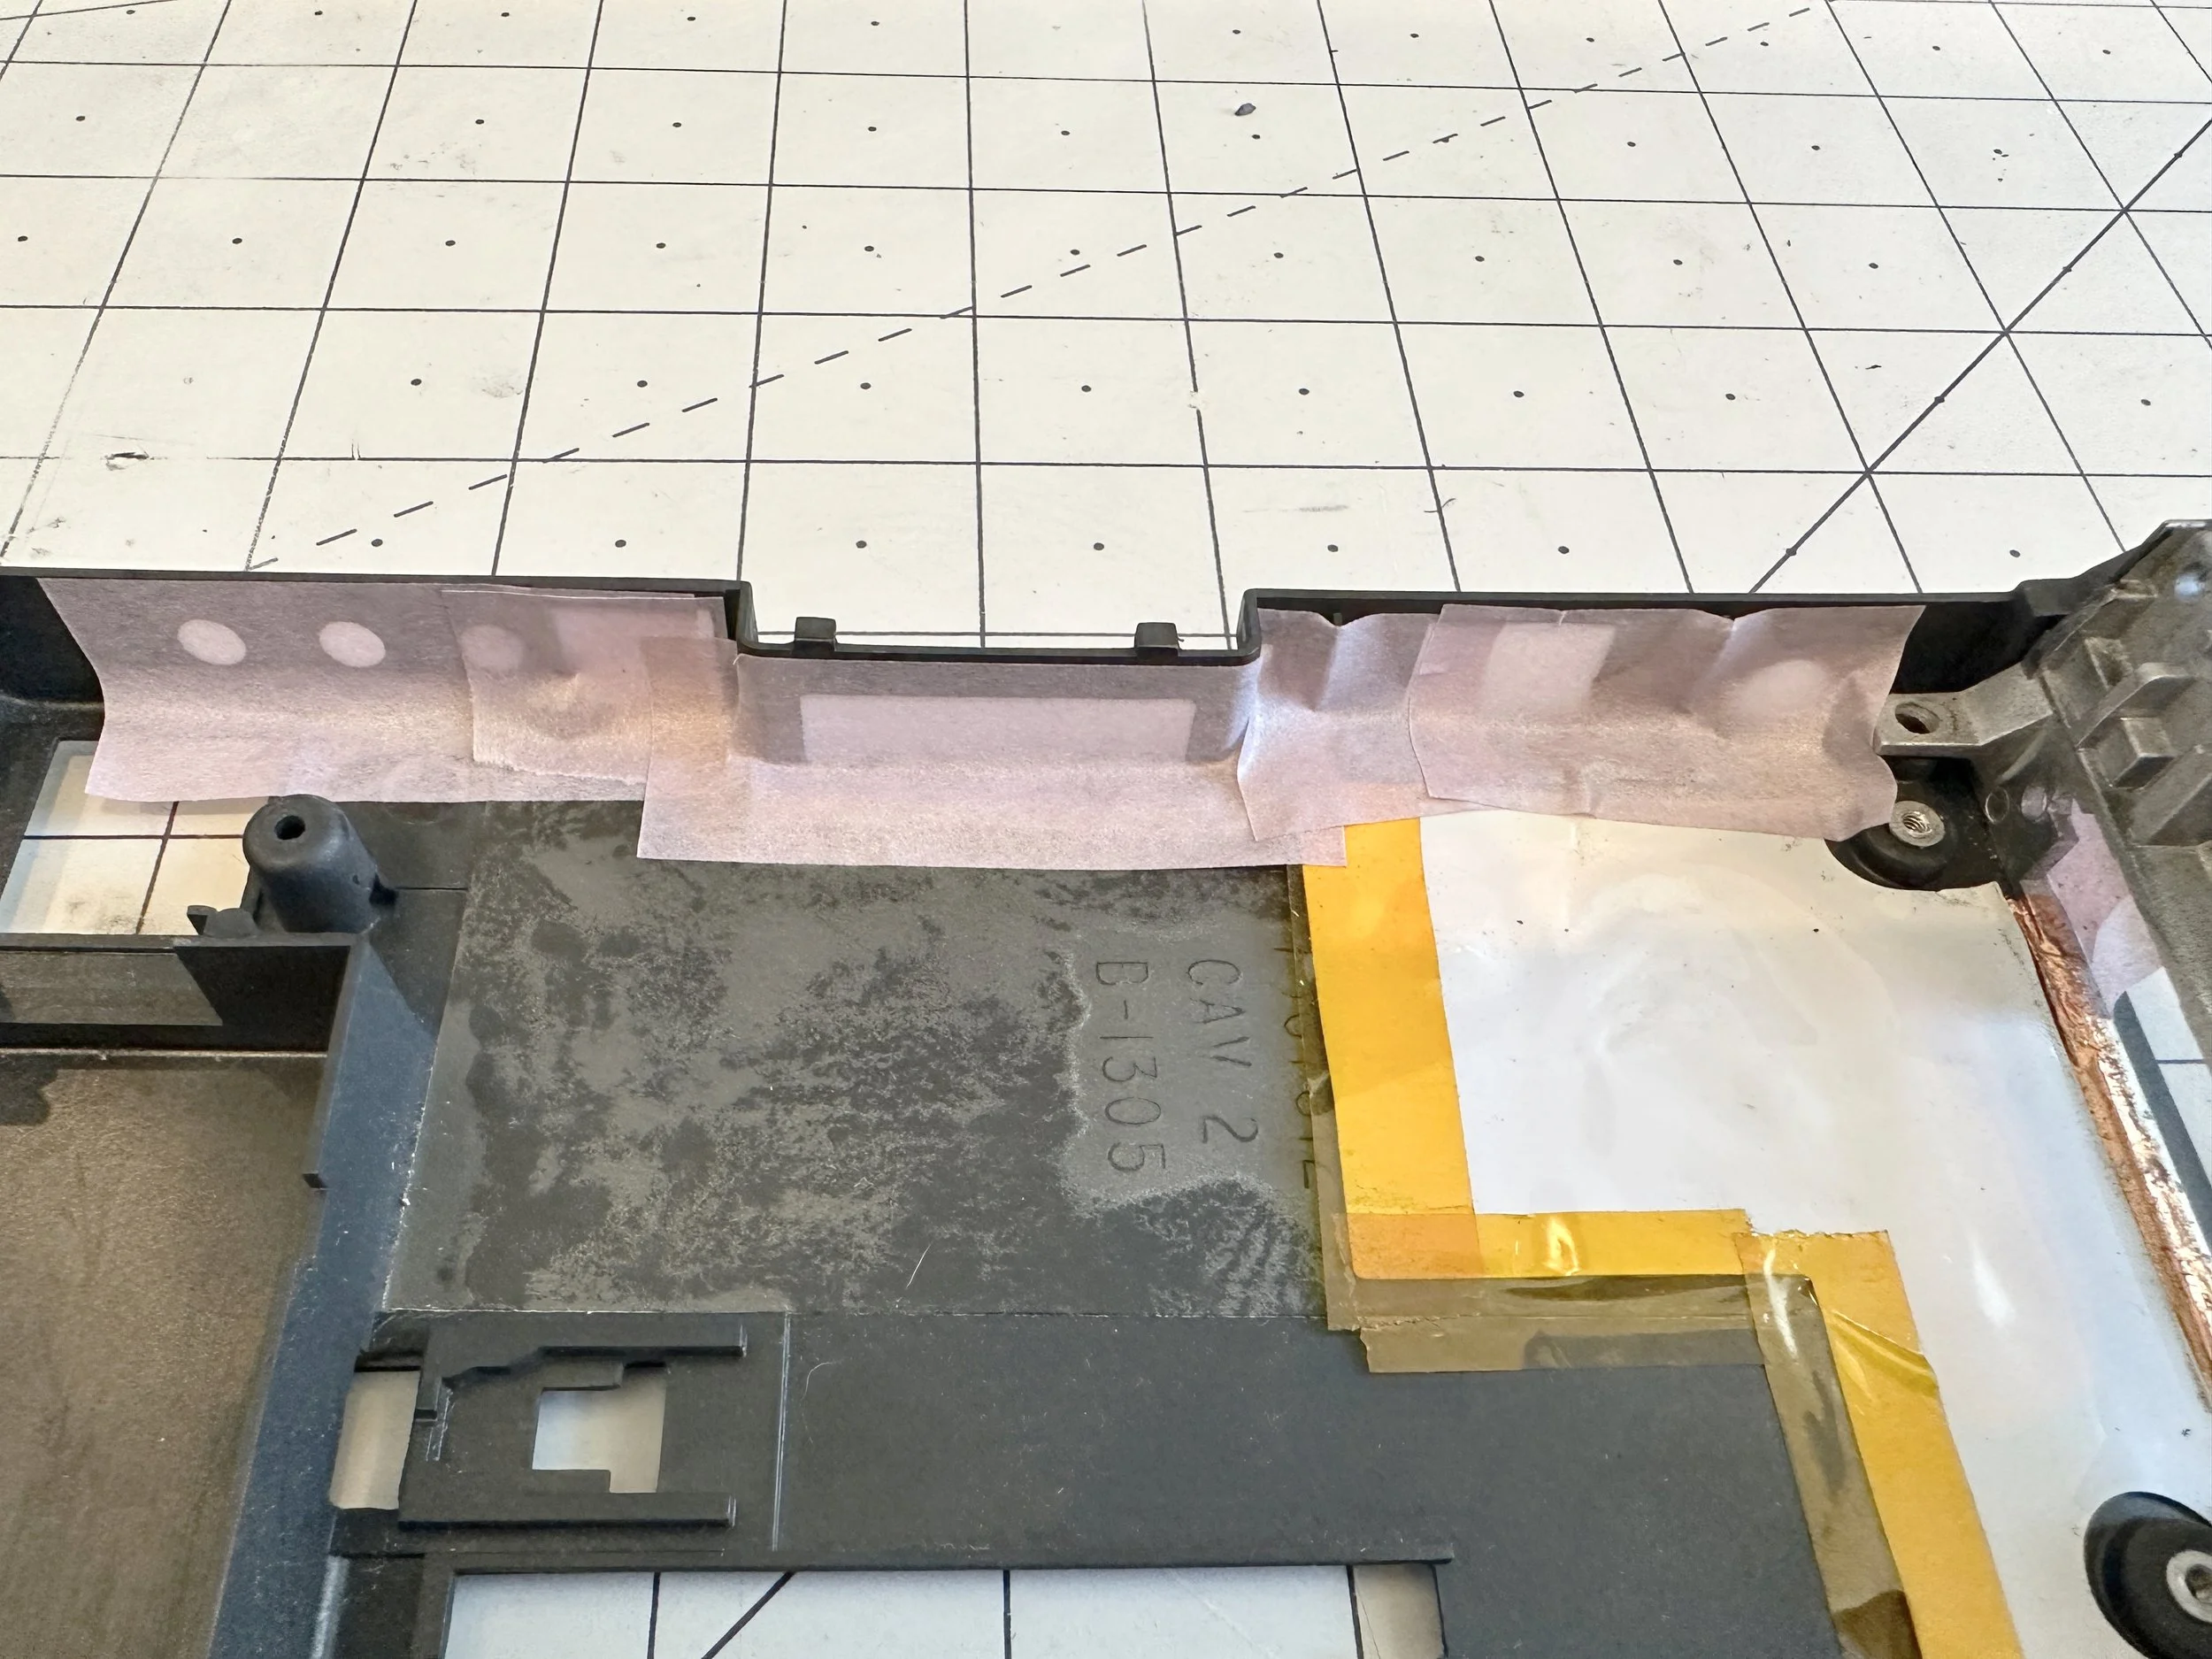
Surface masking for parts that you can’t remove but don’t intend to paint like clear LED pipes
Some areas or parts may not be able to be removed, such as the clear LED panel from the keyboard cover of the product information sticker underneath the case. You can’t remove the clear LED light pipes without breaking the plastic welds underneath, and the product information sticker on the bottom of the case is removable. Still, it is easier to mask off well than to risk damaging it to remove it.
In these cases, we’ll need to mask - and cut - in place.
When you have to cut the tape on a part, you want to minimize as much cutting as possible. If you’re masking out a long rectangle, for example, plan on lining up two of the straight edges with the top and cut the end of the tape. This way, you will only have to make two cuts, not 4.
Using this technique is also helpful because once you mask over a cut line, it can be tough to find that line again. If you’re cutting on the part, there is a significant chance you’ll miss the line and cut into your part.
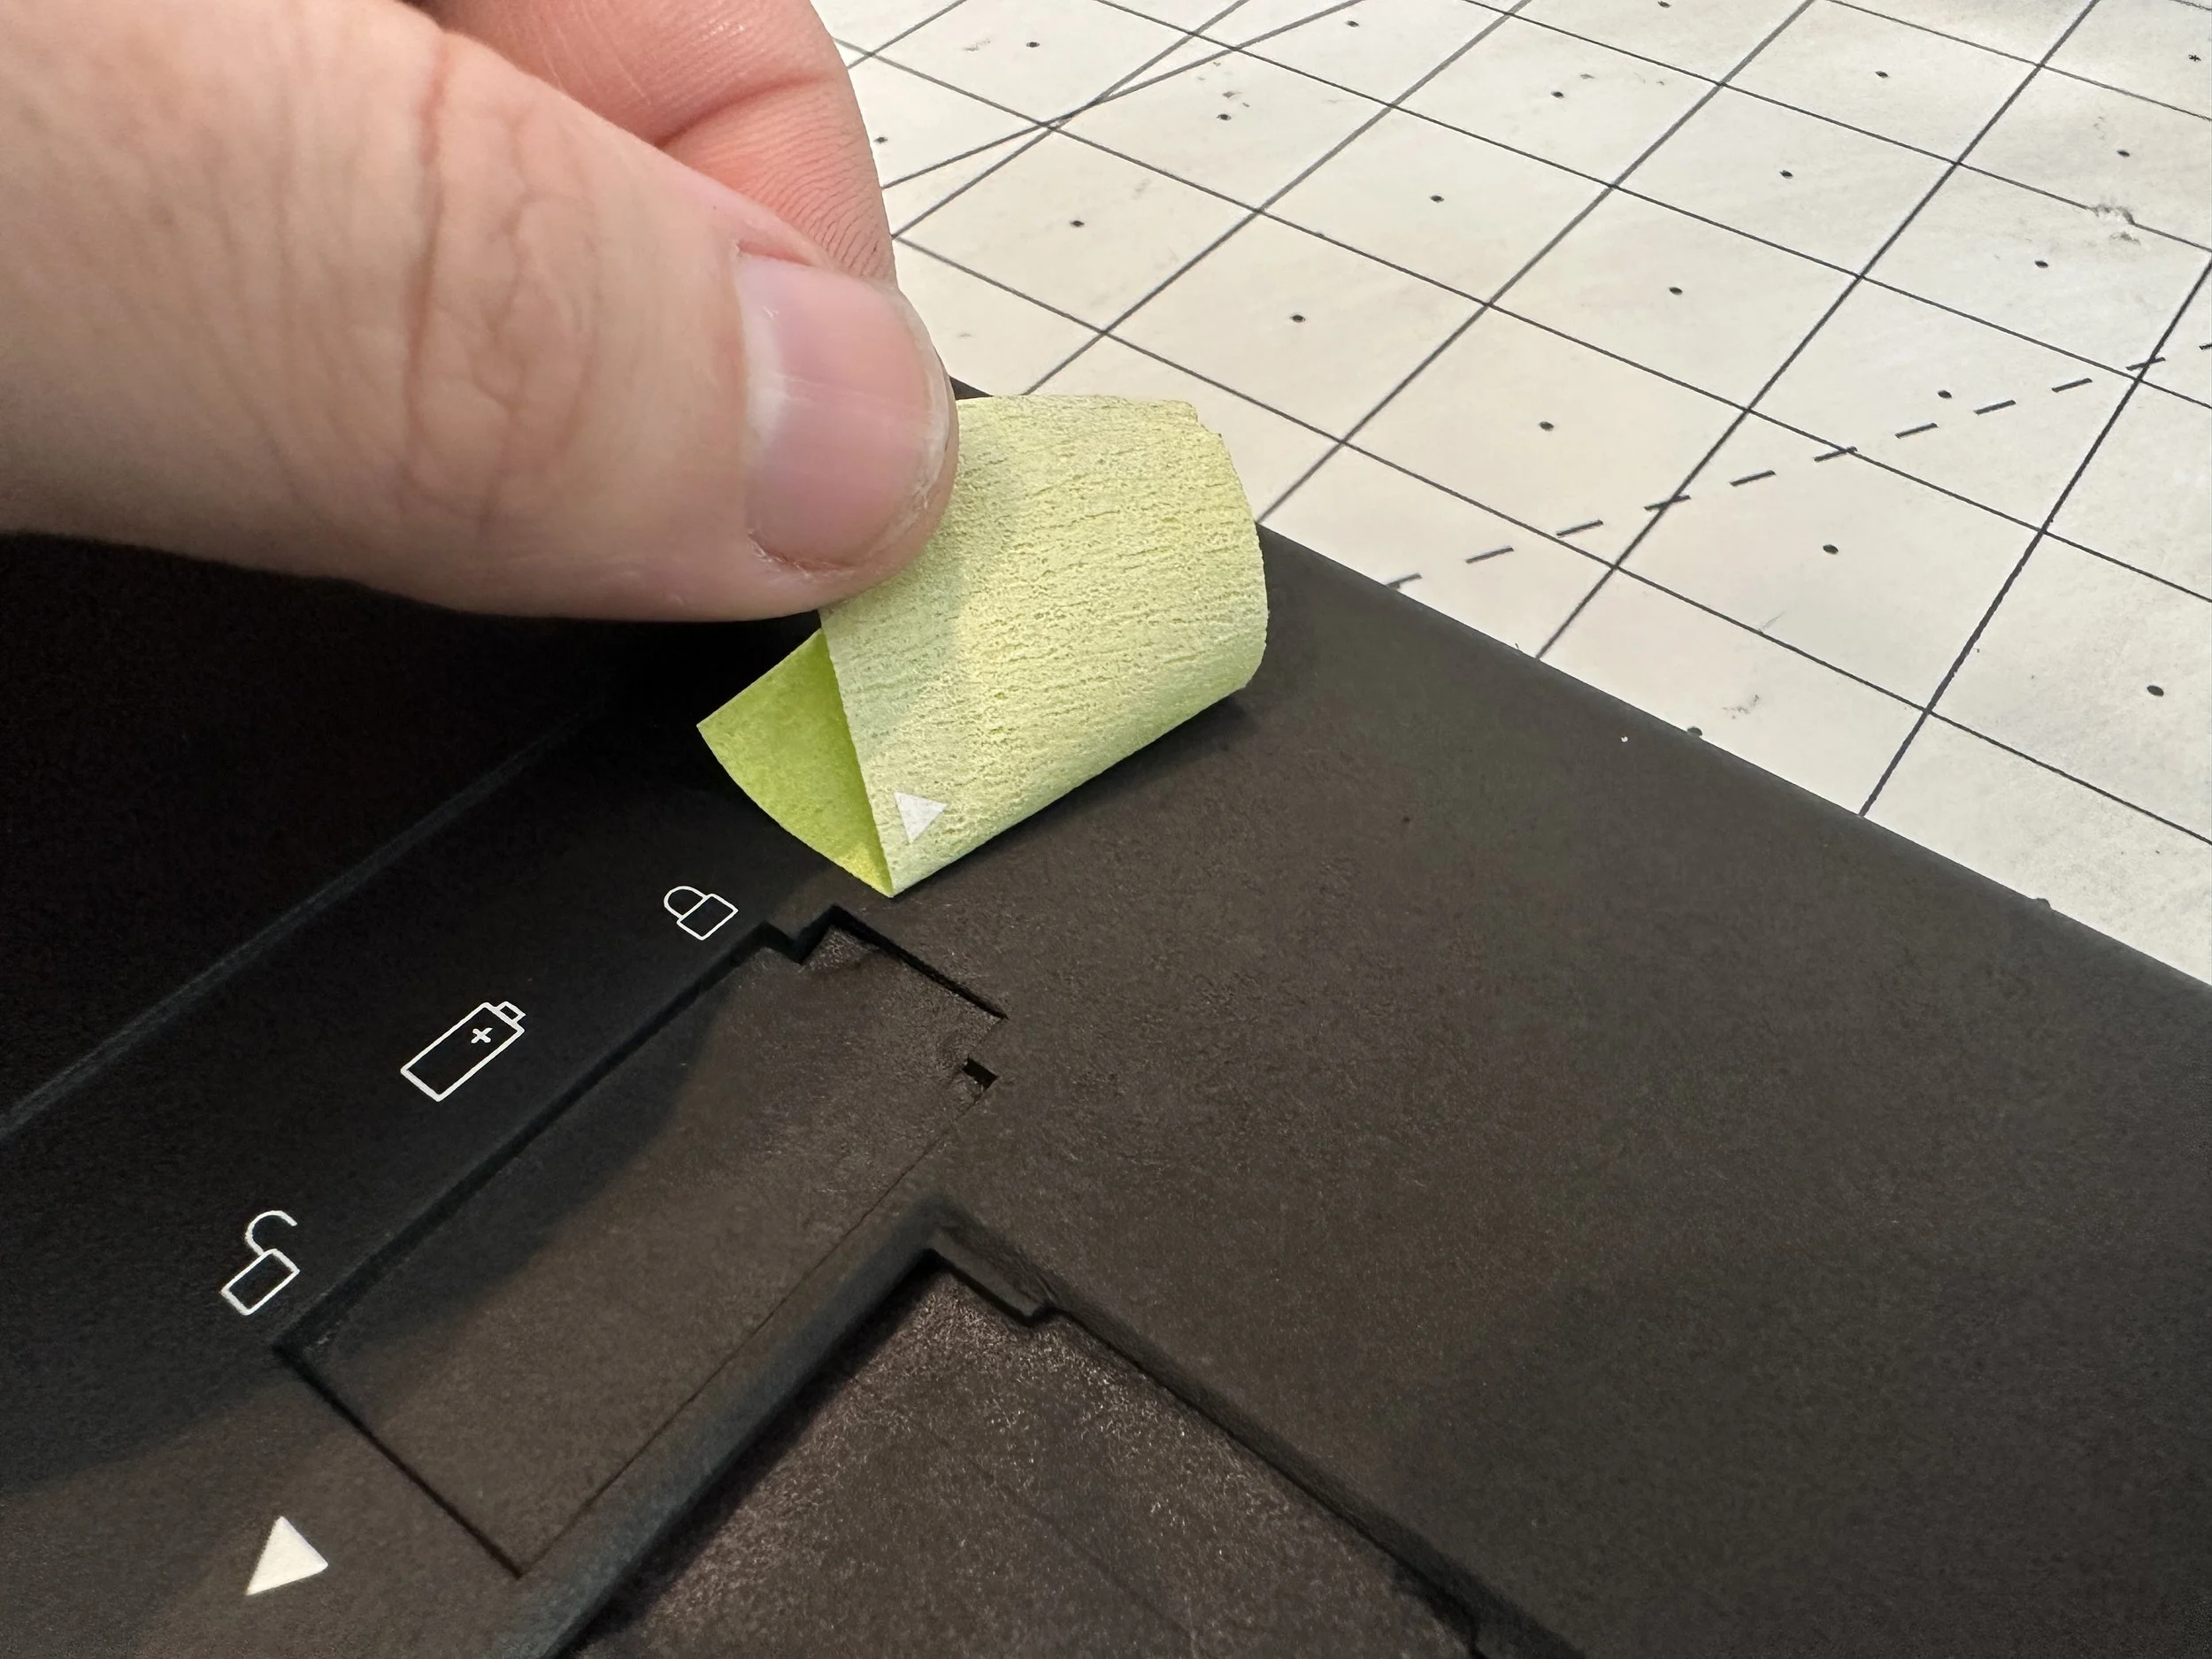
Let’s take a look at the lowercase sticker. First, align the tape on the top and left so we only have overlap on the bottom and right.
We then use the same technique as above to rough out the line with a plastic spudger. This time, however, we will be cutting the tape on the part instead of pulling the tape off.
To do this, use your knife to find the gap between the label and the recessed part. You can then run the knife down this gap in one direction.
When doing this, you should use as little pressure as possible. The more force you impart on the knife, the more energy will be behind it if you slip and the more damage you will cause if it hits another area. Go slow.
Once you’ve made your first cut, you can find the edge on the other side using the tip of your knife and slowly follow it down the other end.
At this point, if you see any areas showing that you need masked, don’t feel the need to pull up your tape and redo it; cut another piece and add it on top.
As before, run your spudger around the edges, pressing the tape down into the space between the label or part and the edge.
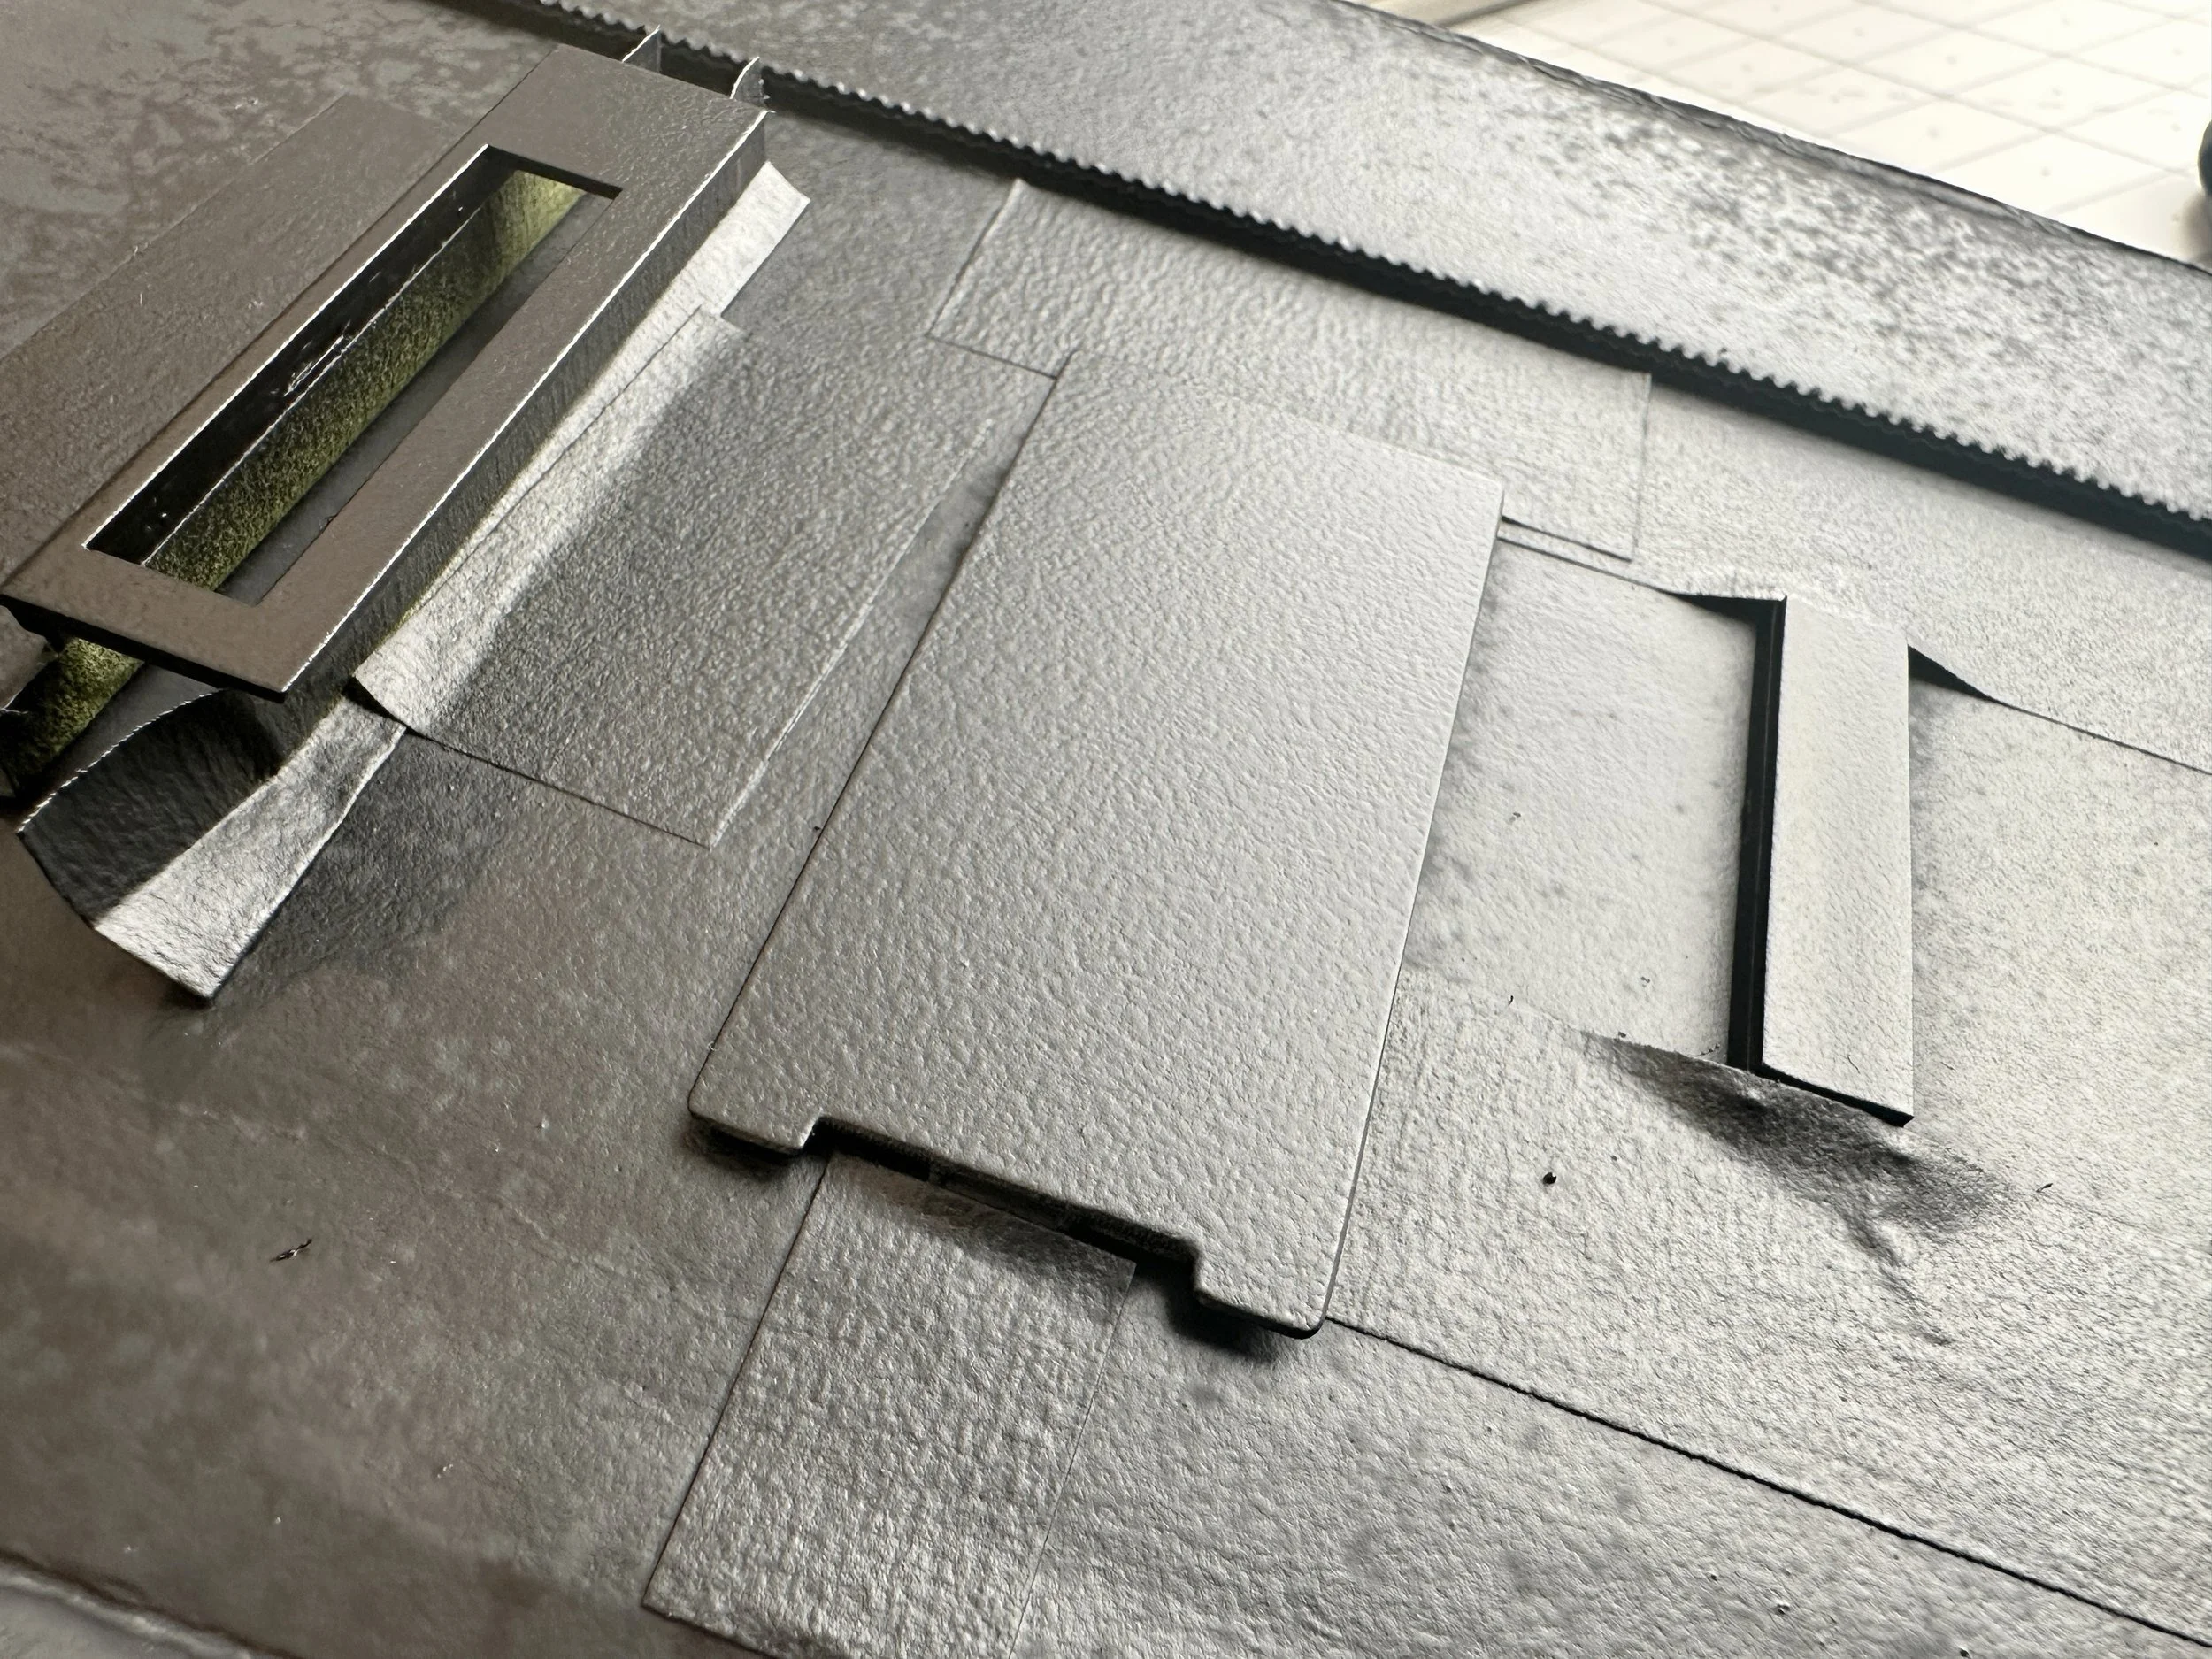
Masking case holes
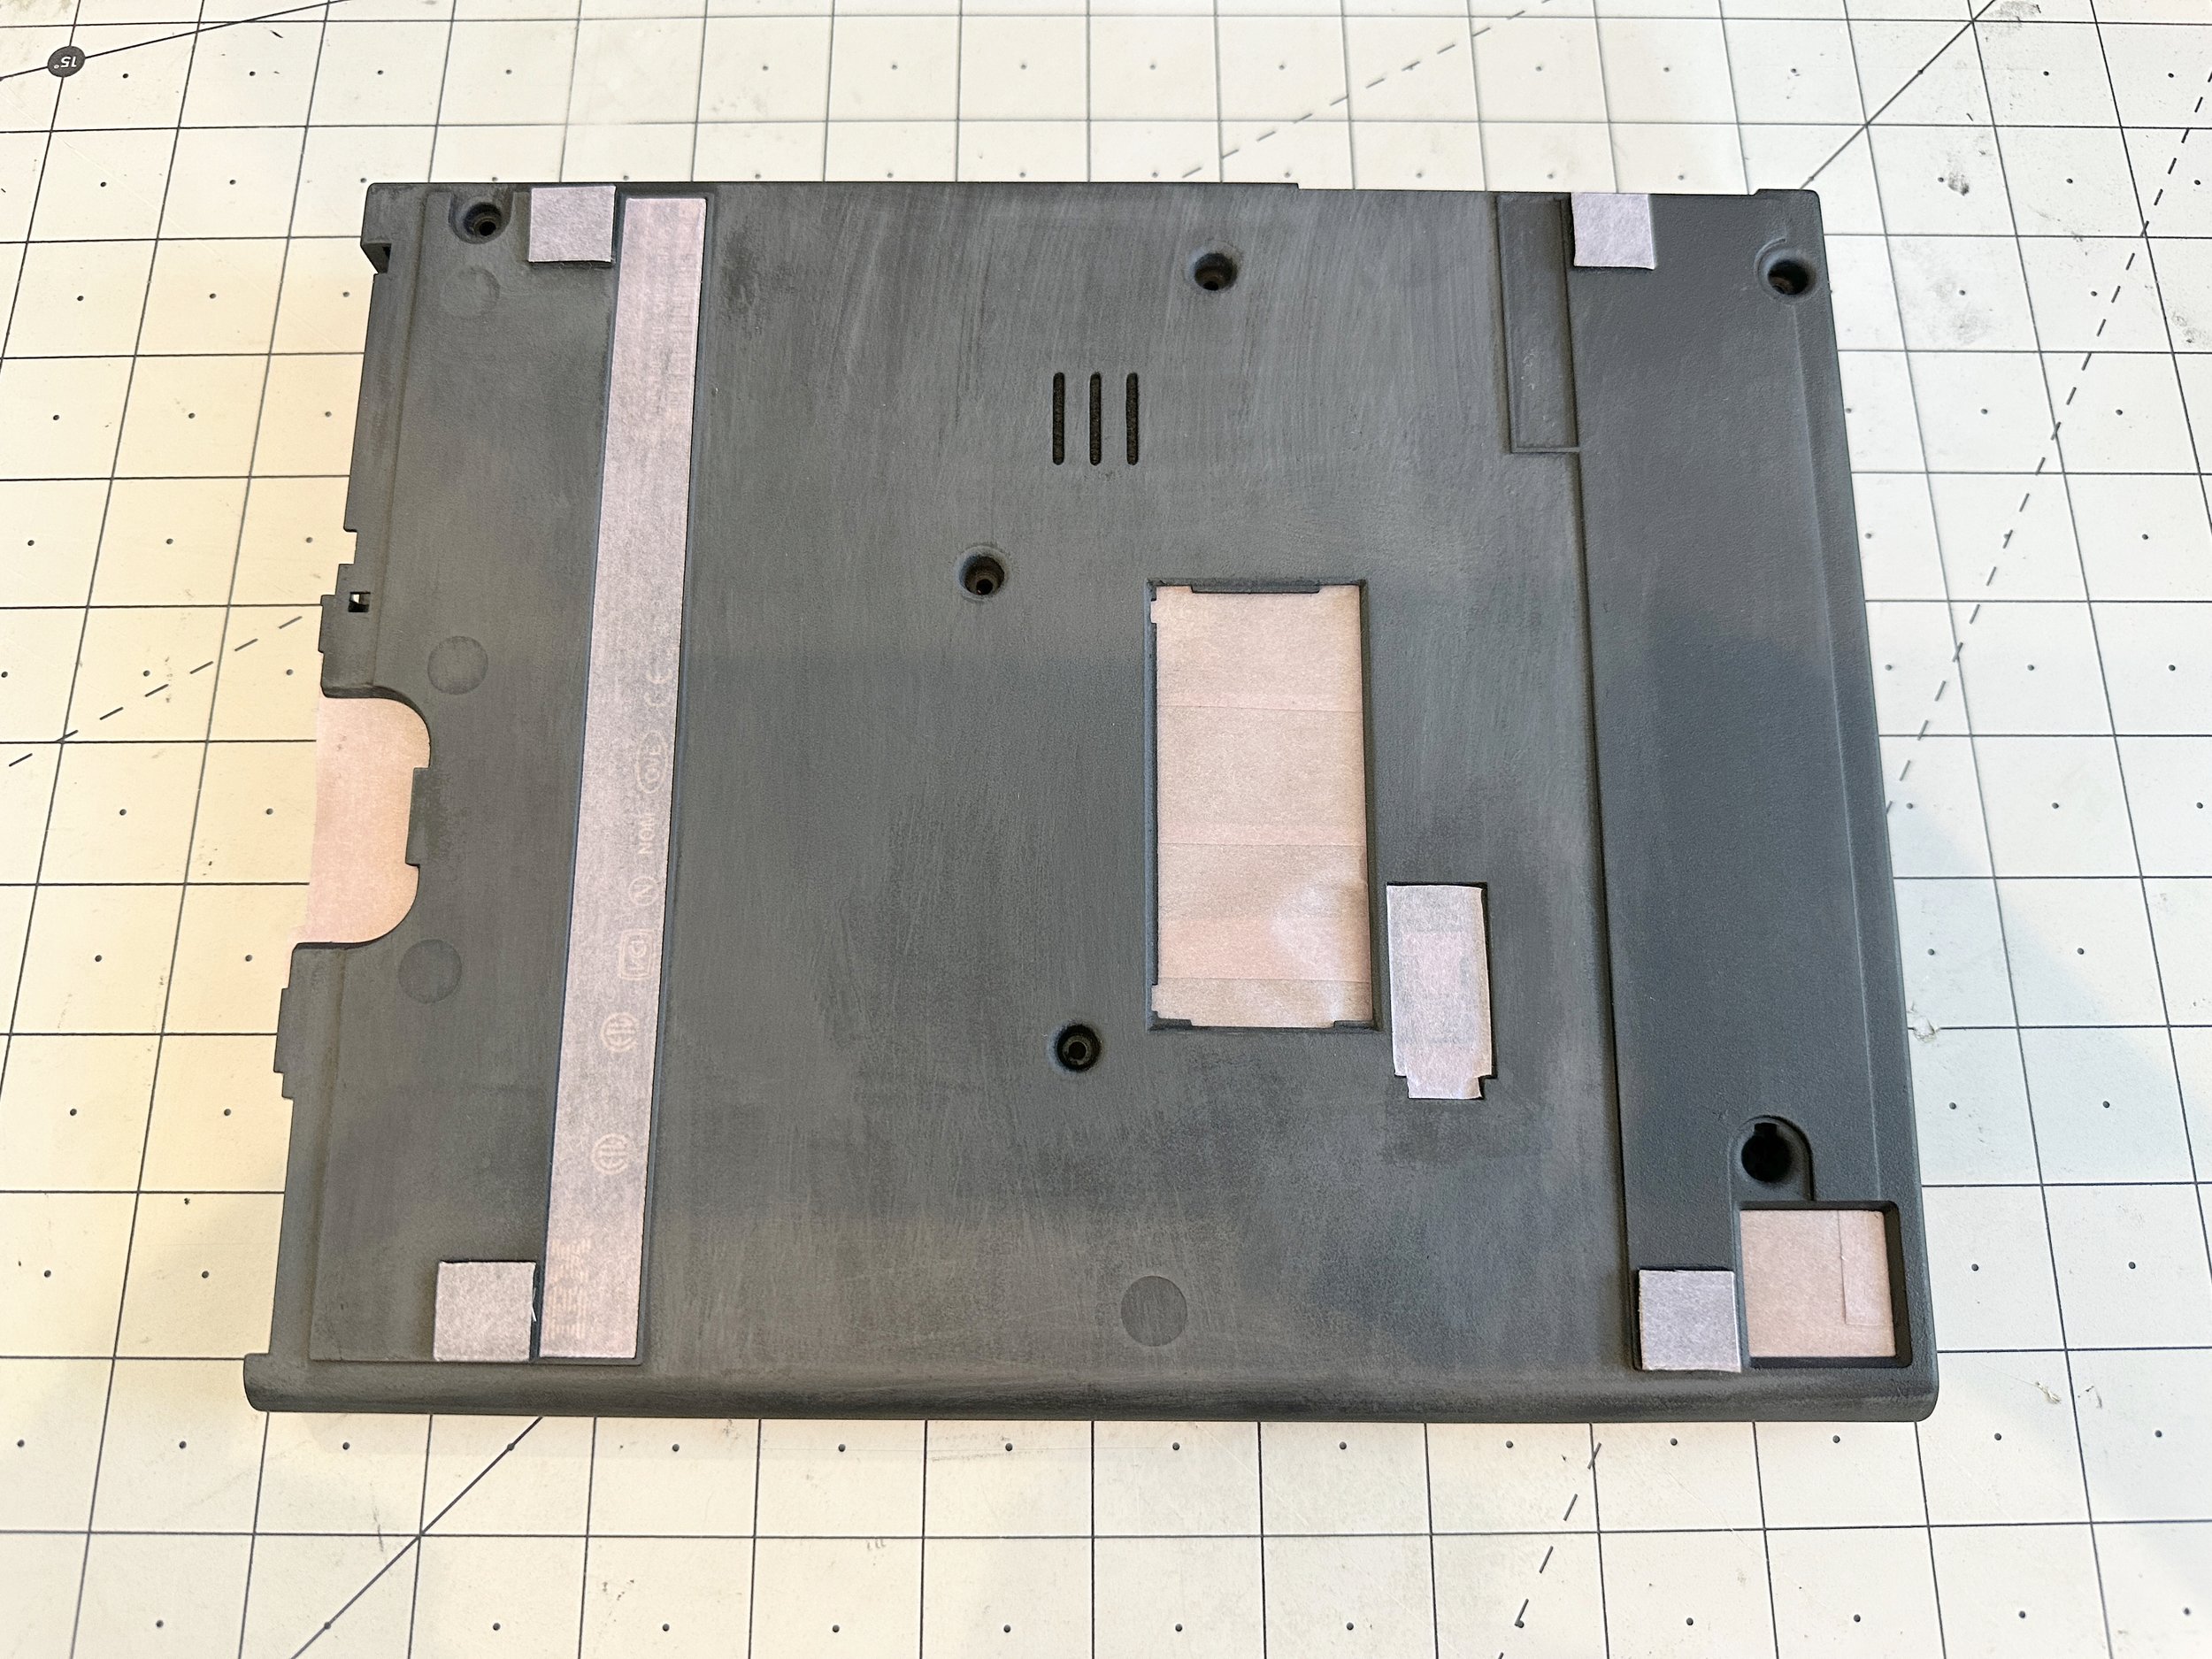

You should always mask case holes from the inside if at all possible. This is because you never want to see the paint line. This means that the paint line should technically be inside the case. When looking at a fully assembled laptop, no matter what angle, the paint should “wrap around” all holes and even the top edge of a case.
Note: Ensure you’ve removed all of the components and covers from the case.
To begin, take long, large strips and start masking out the holes on the sides of the case. Don’t be afraid to leave extra tape out of the top. The most crucial part is ensuring the holes are sealed well from the inside.
Masking tracks where parts will slide and move
Holes in the case aren’t the only thing that should be masked. There are some parts that use tracks to move freely when assembled. The battery lock is one of those. Not only will you need to mask the hole in the case itself, but you will want to mask the track that the part slides on.
Large area masking
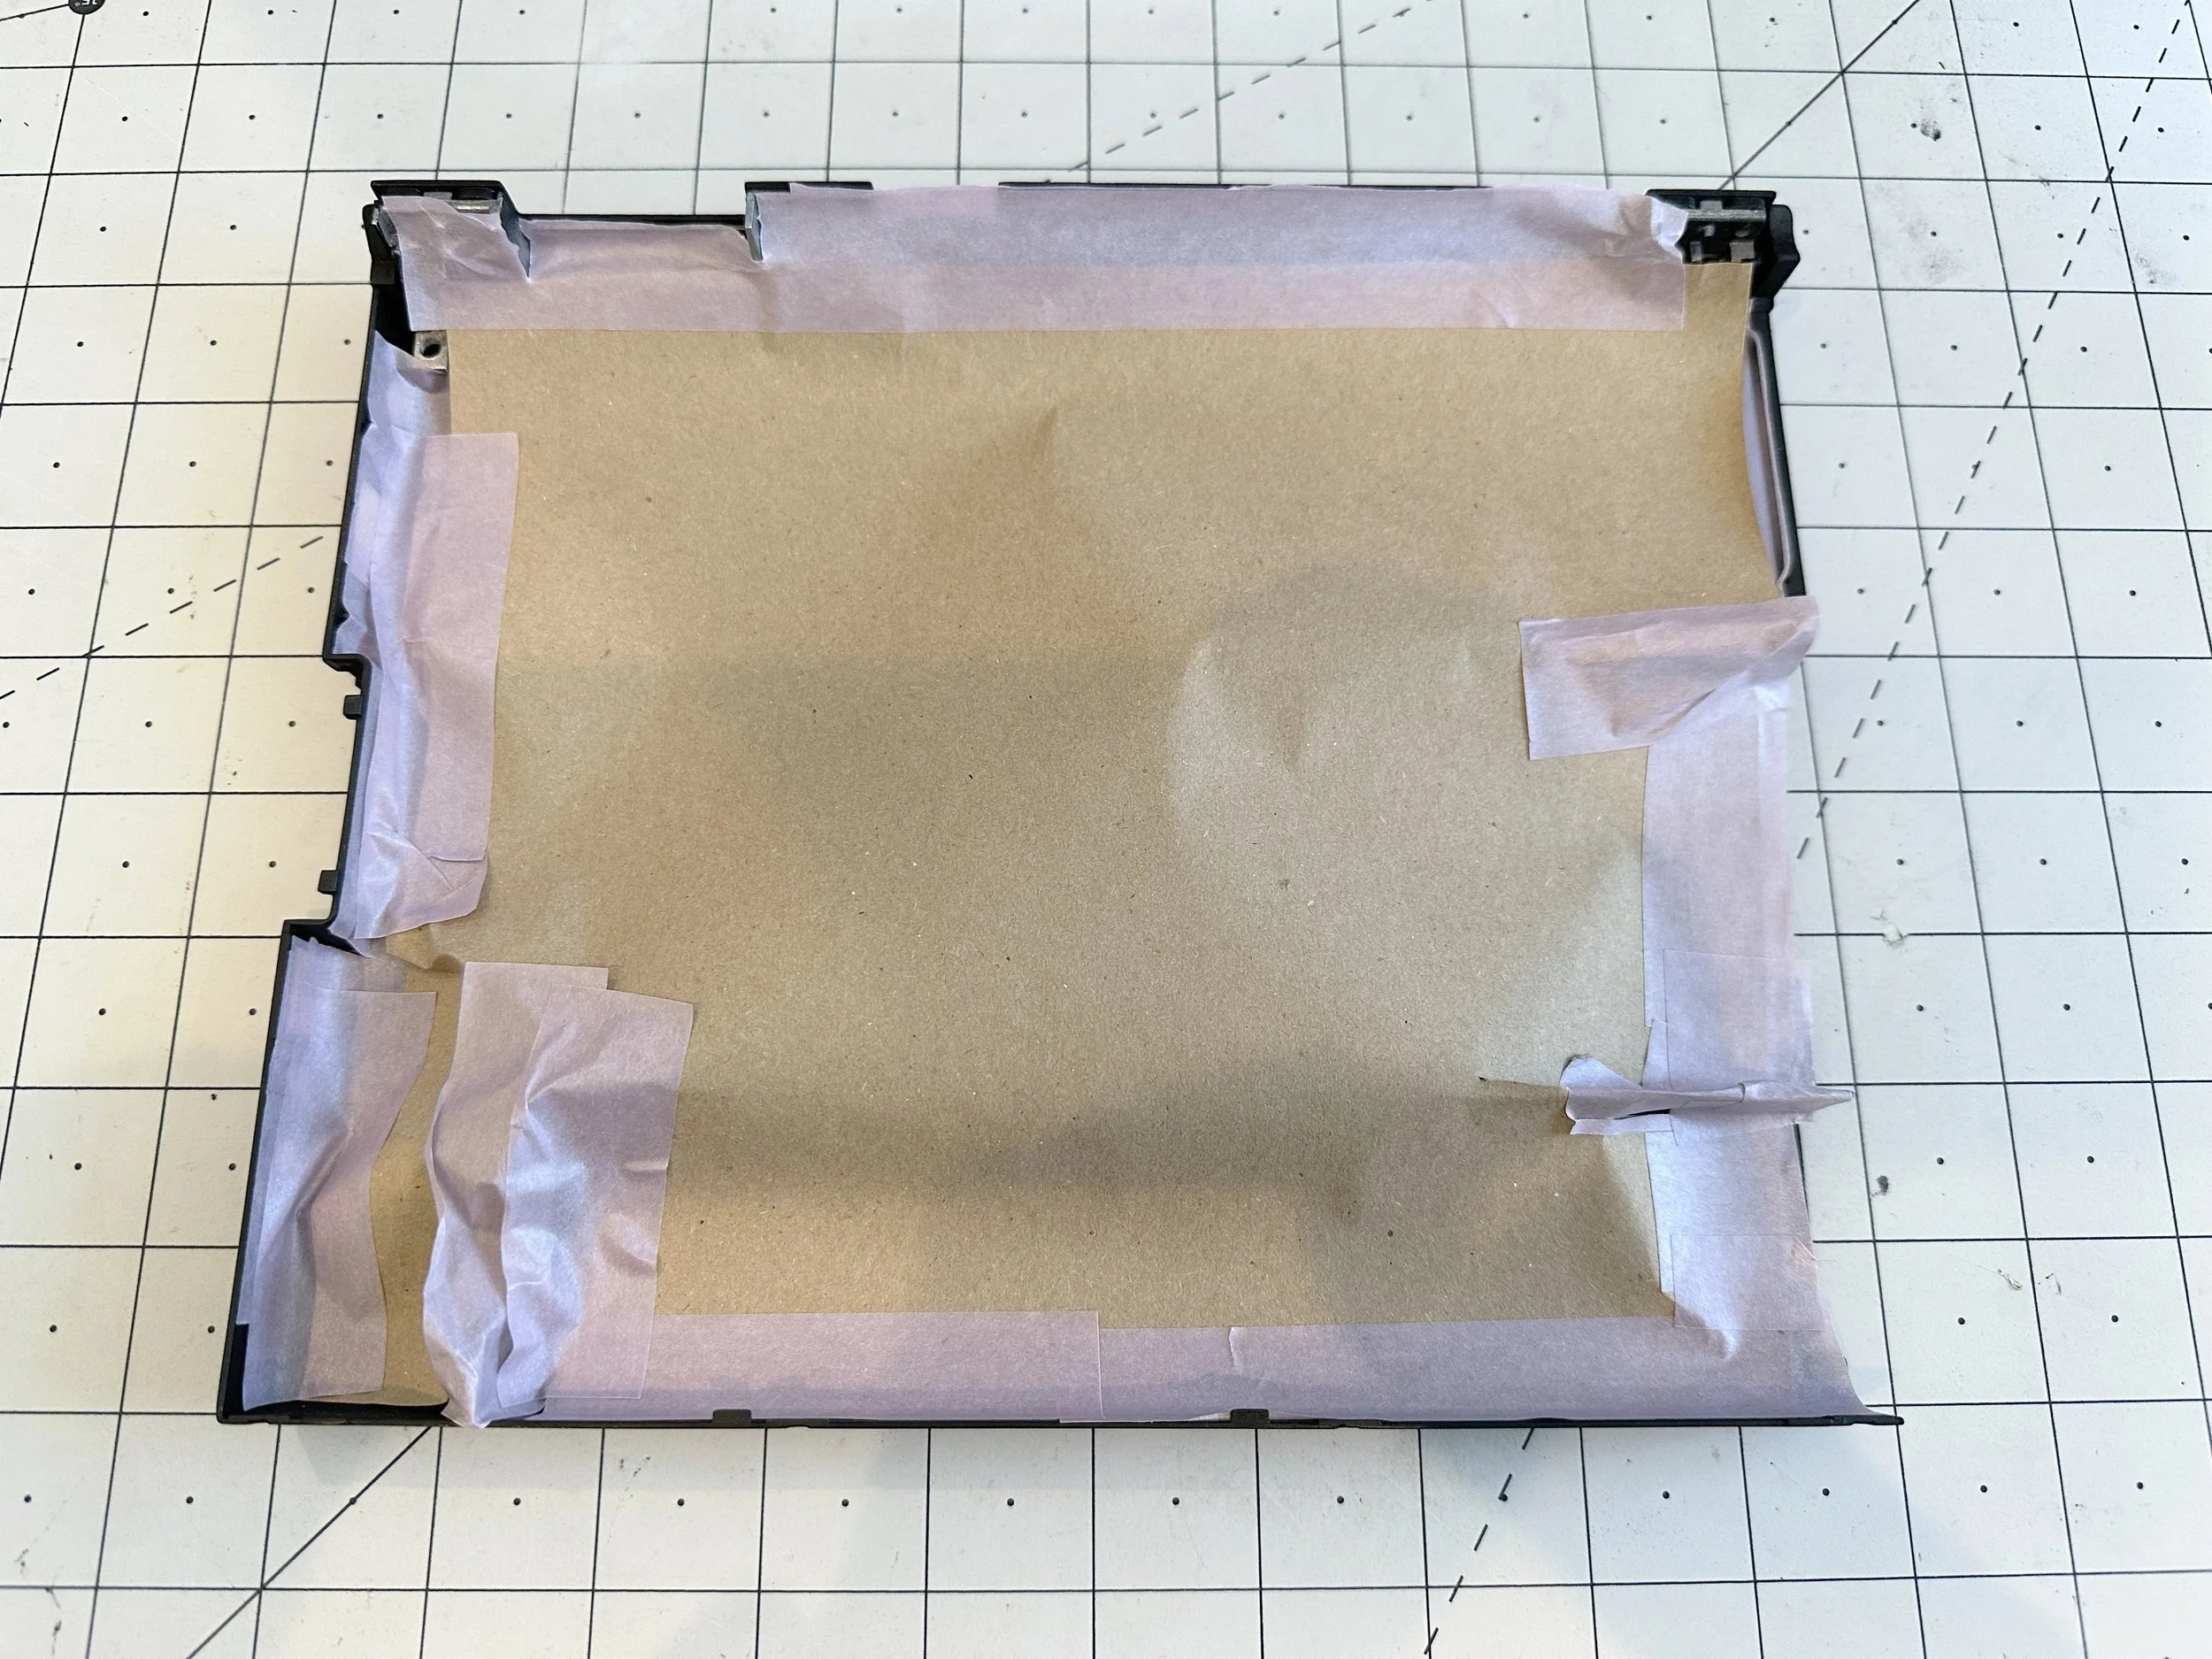
Paper sheets are great for area masking
Don’t feel the need to use tape for everything. Once you’ve made sure the holes of the case are sealed well, cover the large areas with paper and tape the edges down.
When you’re completed here, you should have all of your parts masked and ready to paint!
Step 4: The Base Coat
Before applying the base coat, you’ll want to make sure you have your area prepped, your paint ready and all of your parts lined up. If at all possible you’ll want to spray your parts at the same time. This will minimize small differences in the base coat and ensure a uniform look.
It’s also important to paint in the right environment. If you can’t spray in a paint booth and need to do it outside, take the necessary steps to minimize dust and debris. If it’s too hot (> 85°F), or too cold (< 65°F) its better to wait for a more favorable temperature than to move ahead and risk messing up your paint job, or even worse, damaging or warping your parts.
Preparing your paint
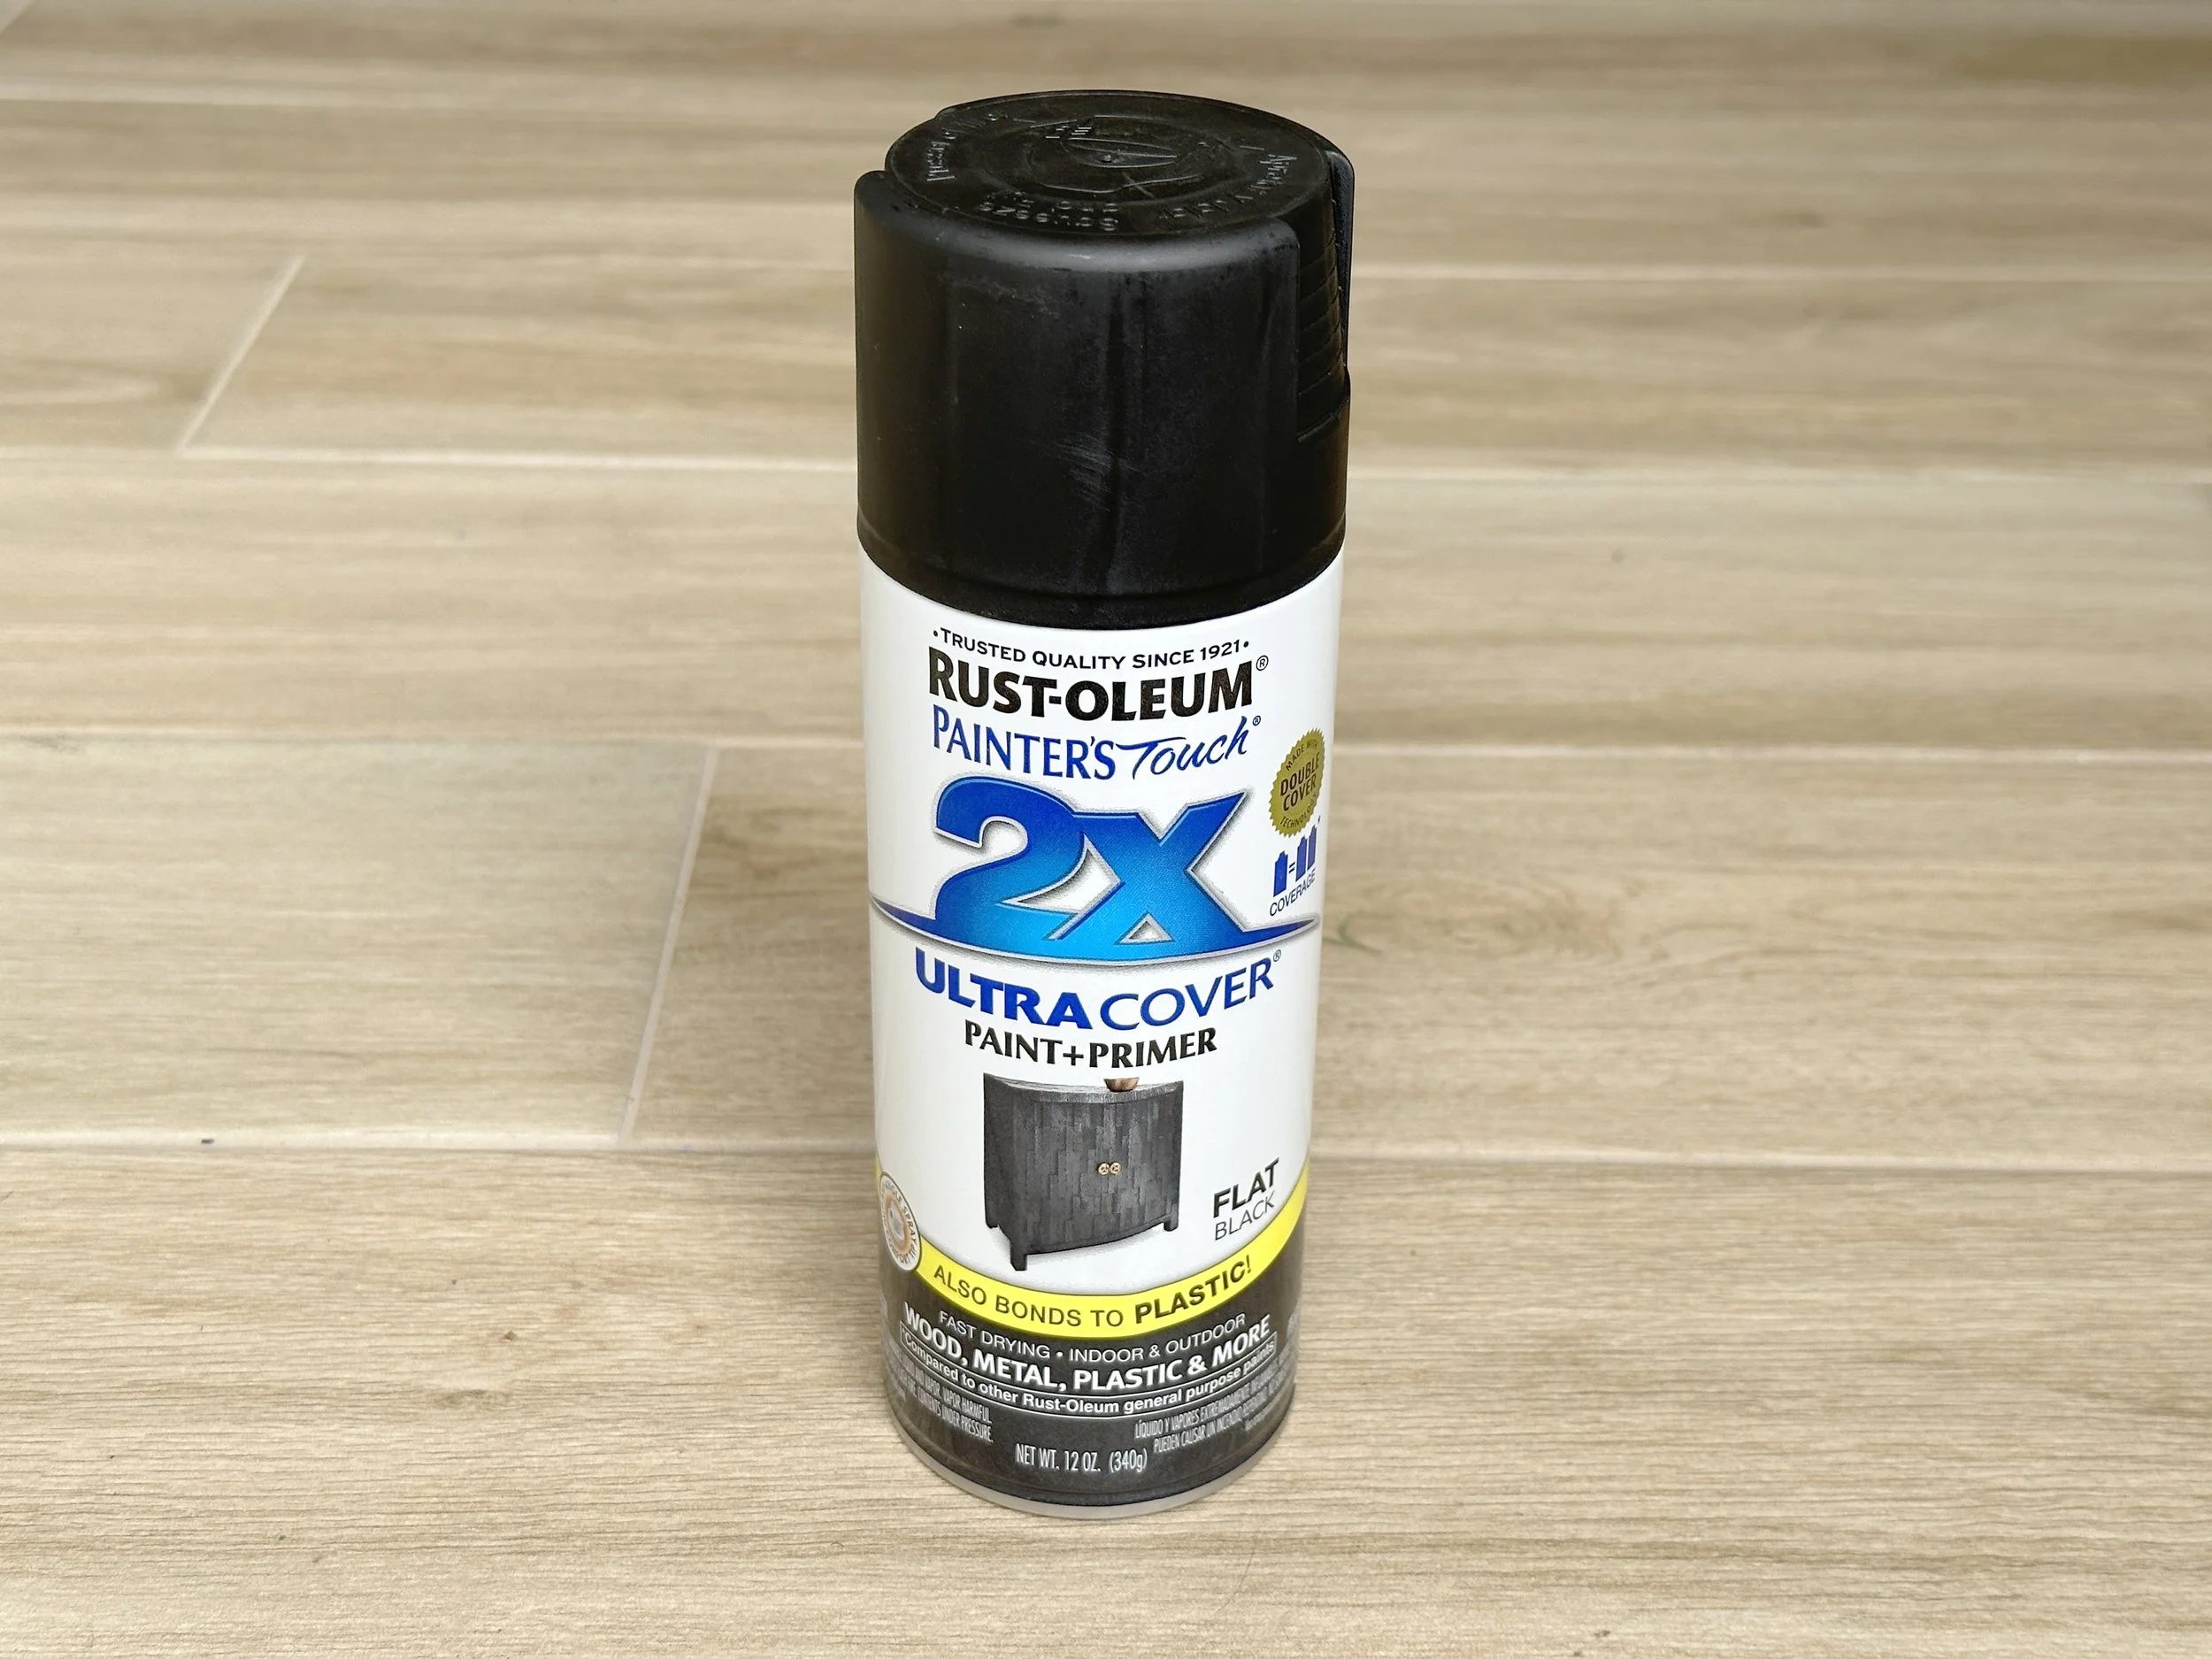
Rust-Oleum 2X Ultra Cover Flat Black (1K)
Before you start spraying, make sure your paint is ready. For this restore, we’re using a 1K, 2X flat black spray paint from Rust-oleum. The 1K referrers to the fact that it is made up of 1 component (no separate hardener needed). The 2X refers to the coverage - this is a branding thing that’s specific to the Rust-oluem Ultra Cover Paint + Primer line. I’ve gotten great results for the base coat with this before. It adheres great to the plastics, covers well and importantly, the dry transfer icons needed in the next step adhere well to the cured surface.
When starting a new project, use a new can. This ensures that the nozzle is clean and there isn’t a clog elsewhere in the can. When spraypaint ages the texture can also change. Trust me on this one. To get even, consistent coats on your parts, use a new can.
Before painting you need to bring up the temperature in the can. Never expose a can to flame or direct heat. I usually set the can in the sun for a few minutes, or if its a cooler day - I fill a sink with warm water and soak the can before - and in between coats.

Keep it clean
Immediately after each coat, I always clean off the nozzle with a q-tip and IPA. Make sure to dry the tip afterwards. Paint buildup in and around the nozzle can cause spurts and spots that can ruin the finish. If this happens, the ONLY thing you can do is wait for the paint to cure completely, sand down the paint spots and start over.
Preparing the area
The best places to paint are in well-ventilated, dust-free, debris-free areas where the humidity is below 65%. If you plan on painting outside, there are small spray paint tents you can pick up on Amazon that can help block wind and debris. If you do use a paint tent outside, be careful. These tents can magnify the heat, making a suitable 80-degree day an unsuitable 100+ in the tent.
The next thing to think through is your paint surface. You do not want anything you’re actively painting touching your paint surface. Hang the parts if you can. If not, be extra careful that no wet parts touch the paint surface.
If you can lay out all of your parts, I recommend placing them on individual pieces of cardboard. This way, you can rotate the parts without having to touch them. You’ll want to make sure you can spray all sides evenly.
Painting the base coat
Don’t rush it. You’ll want to put on multiple, thin coats around 10” to 16” away from the part - this is important.
Why? Spray cans are specifically designed with this distance in mind. Too close and the paint won’t have enough time in the air to dry before it reaches the part. It can cause blobs, drips, and runs. Too far and the paint will have too much time in the air and will begin to dry before the next coat is applied. This will cause a rough, grainy or uneven finish.
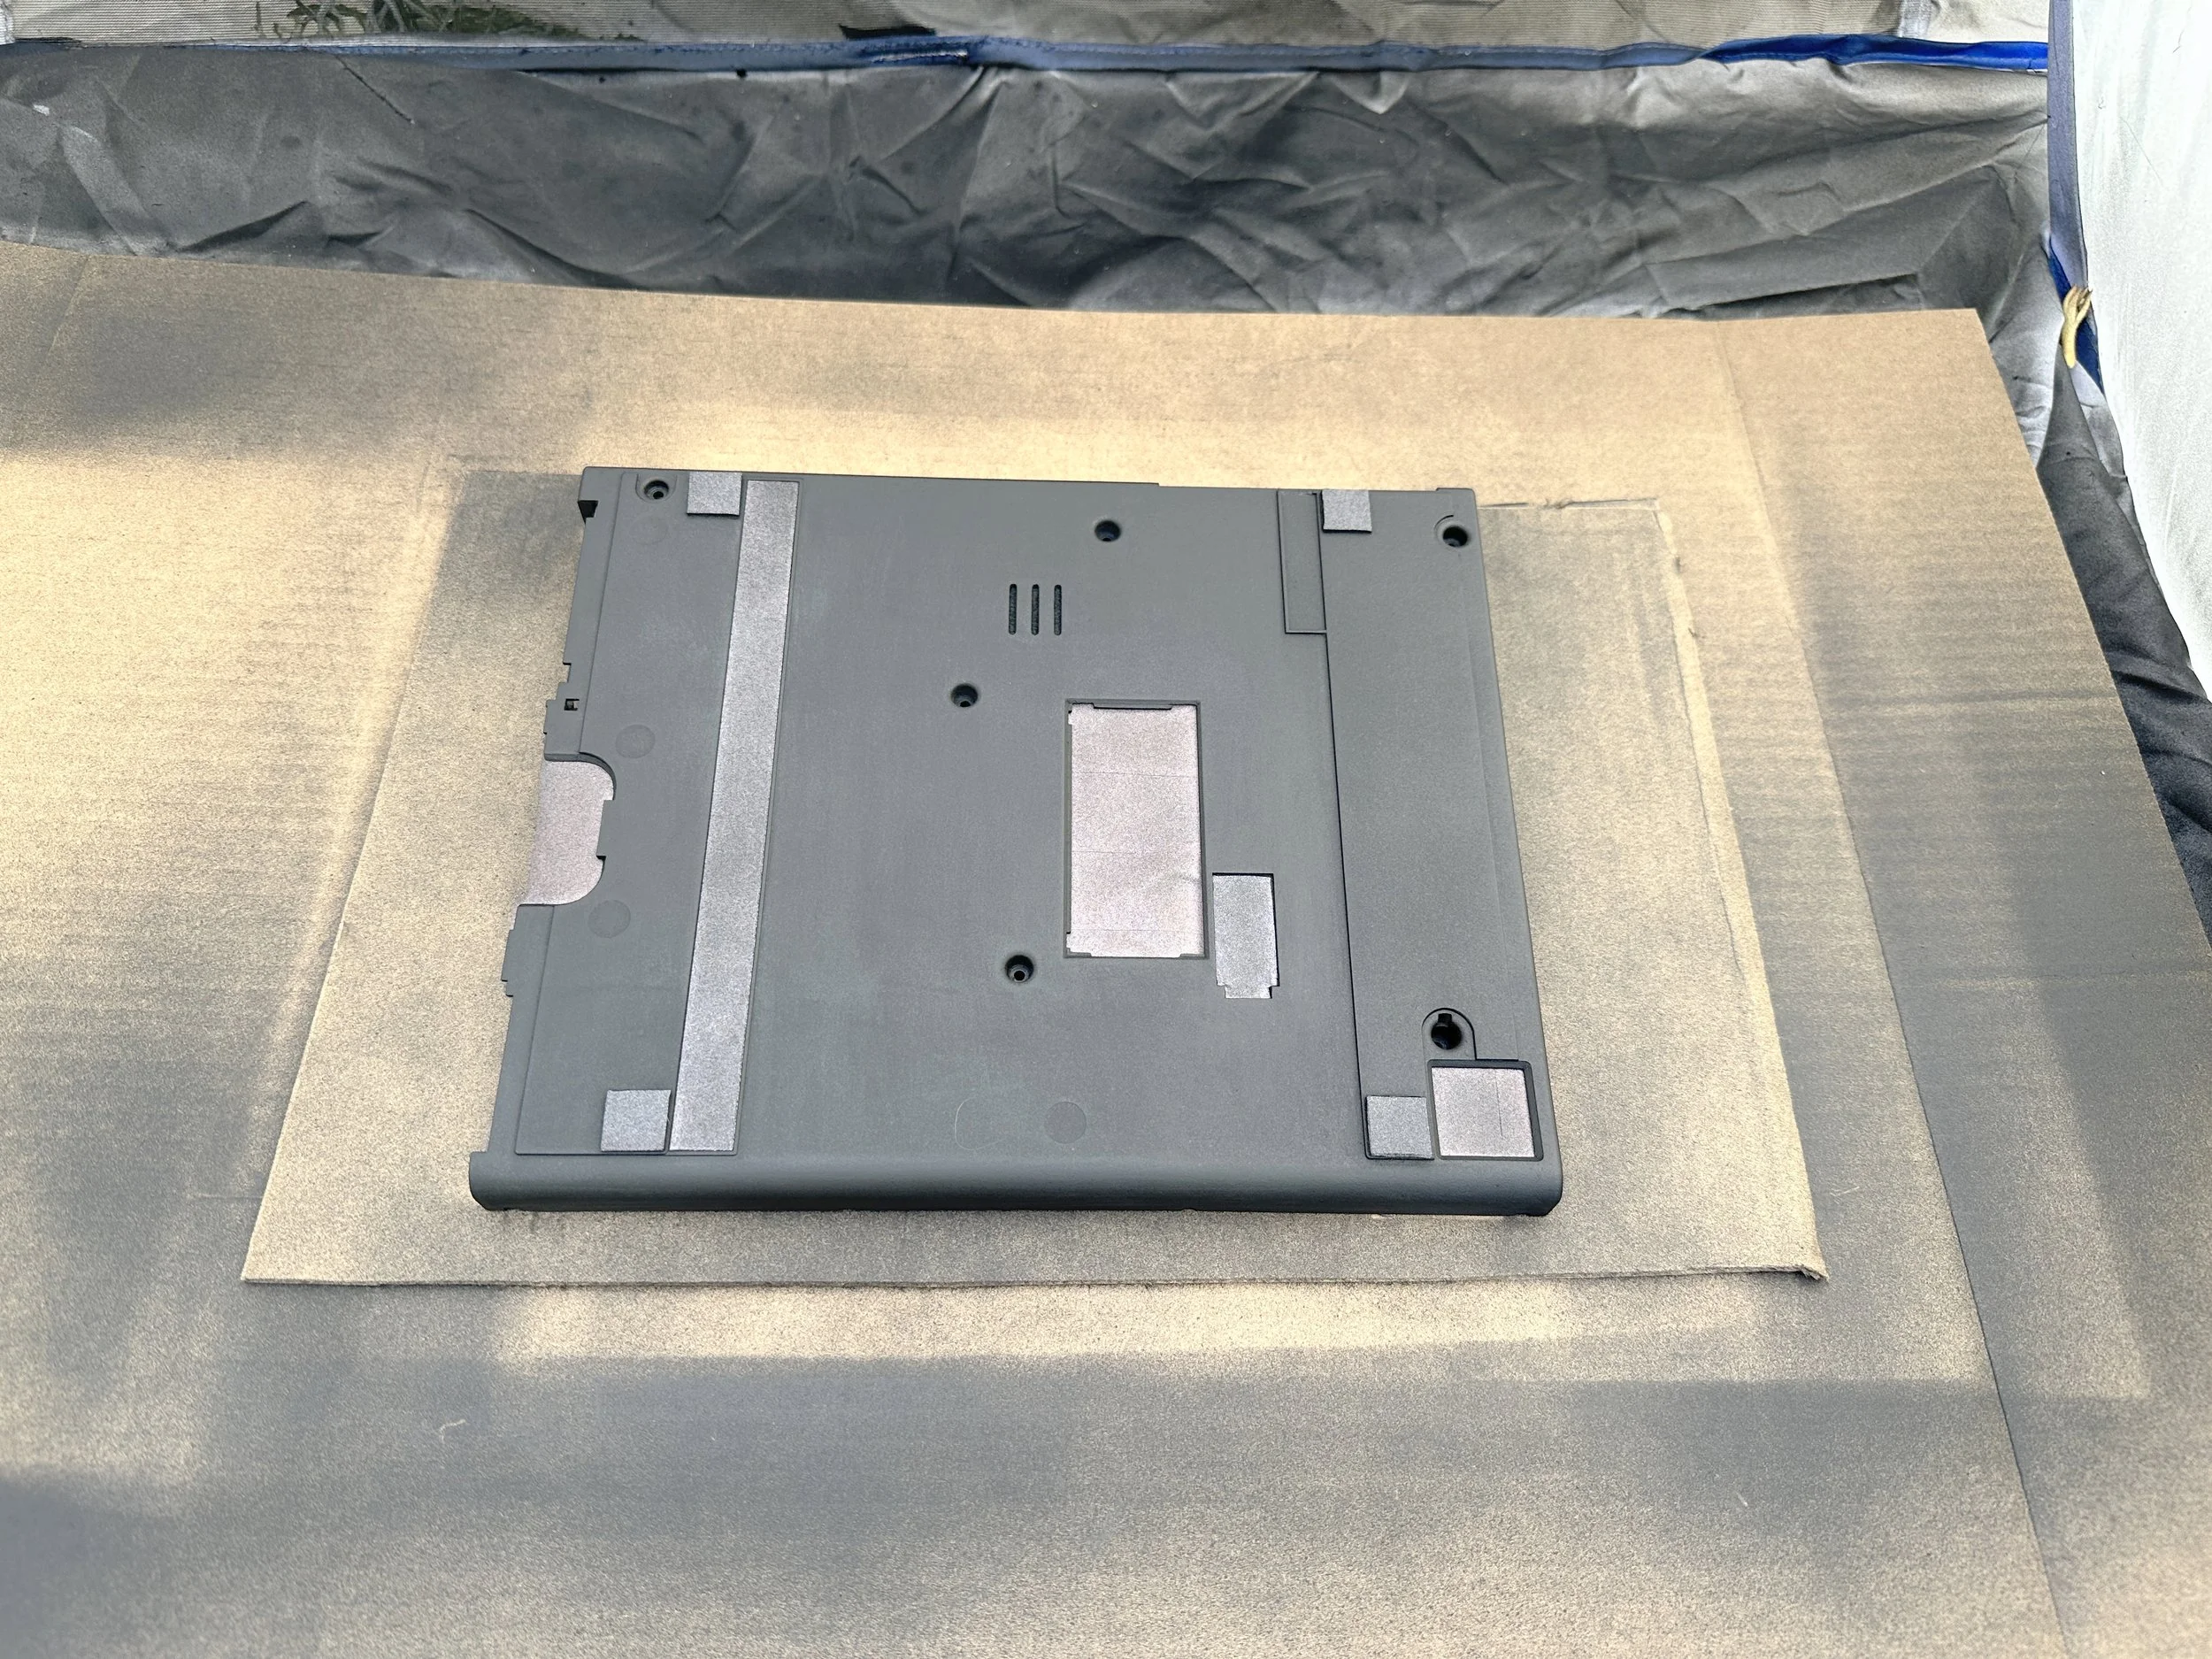
When spraying, make sure you hit all angles of the parts for each coat. For the first coat, you should still be able to see the plastic underneath.
Take your time
Spray in slow, overlapping, even stokes. You’ll want to start and end each spray off to the side of the parts you’re painting.
Wait 3 to 5 mins between each coat. If it’s a hot day, you’ll want to limit the direct exposure to the sun and you’ll be able to wait less time in between coats.
When you’re satisfied with the base coat, and you’ve got good even coverage with no gaps, you’ll want to move the parts to a clean location (preferably indoors, out of direct sunlight) and wait a full 48 hours before continuing.
Generally, you can add a clear coat within an hour of the final base coat, however, because we need to apply the decals before we seal it, we need to wait for a full cure. The process of applying the dry transfer (rub on) decals before that could affect the paint job.
Once everything is fully cured, move on to the next step. You should NOT remove the masking until all of your painting is done, and the final clear coat has cured.
Step 5: Decal work
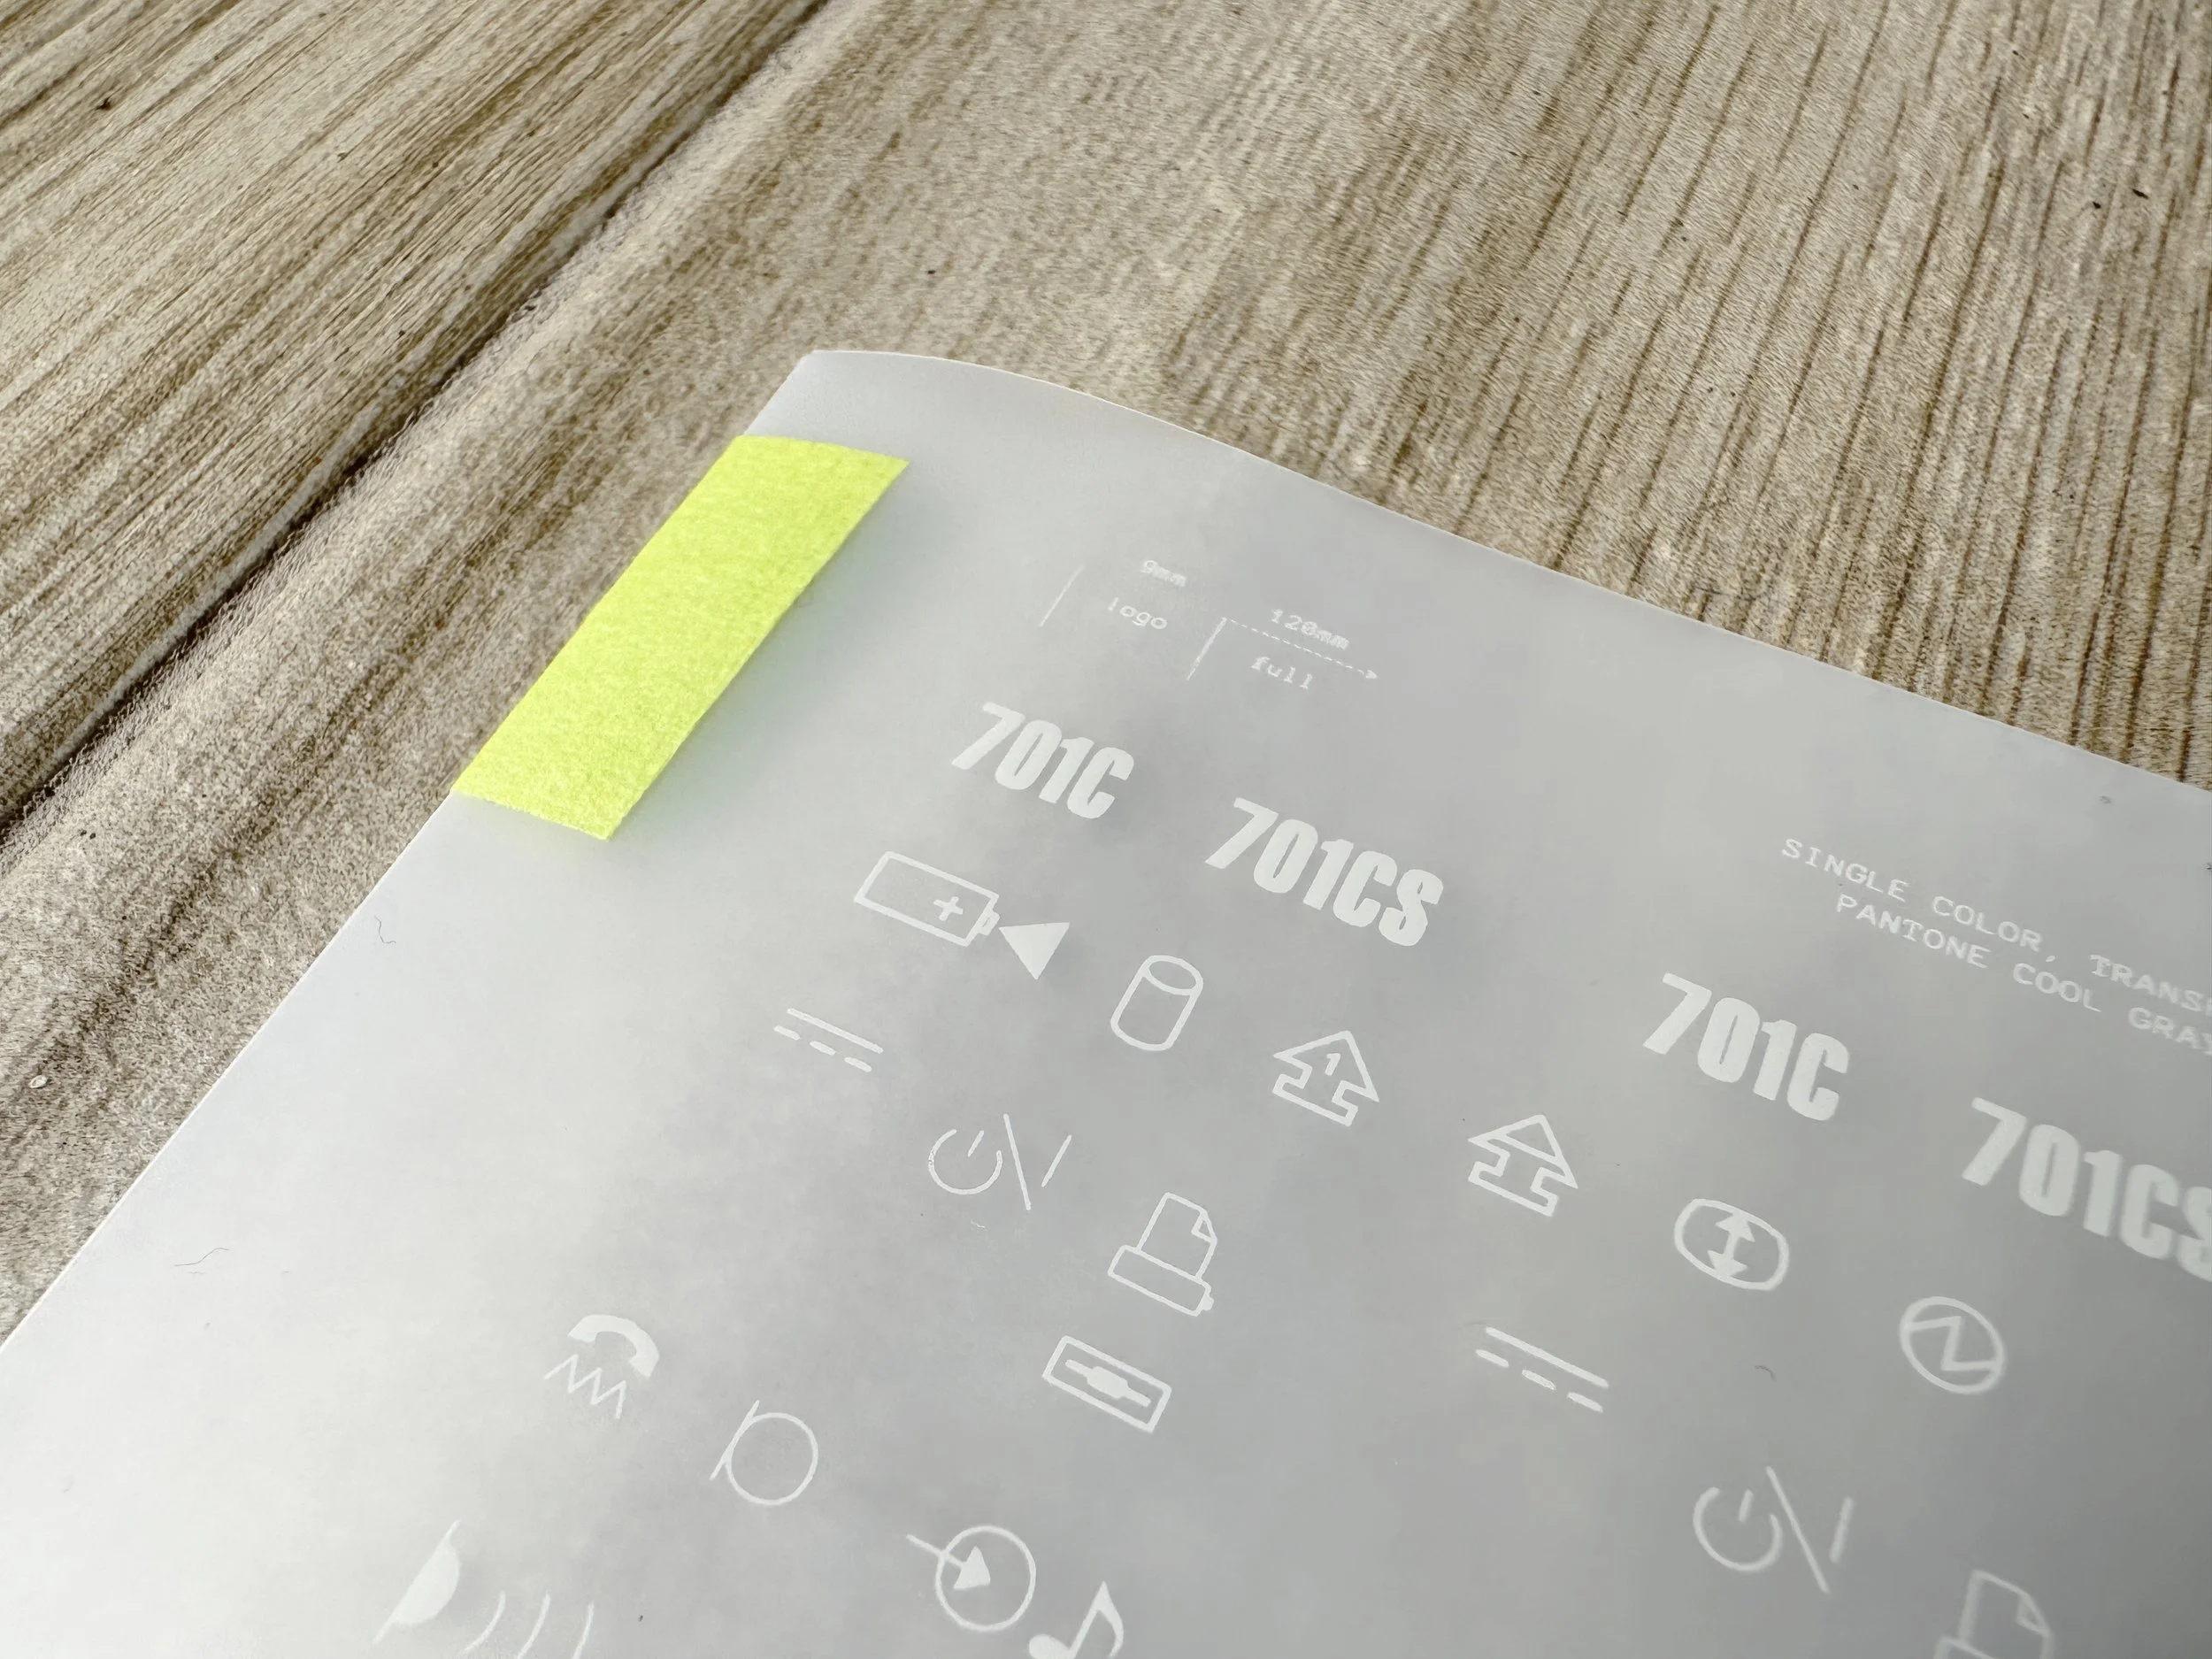

I’ve recreated all of the decals in a vector format, accurate down to the fraction of a millimeter. You can download them and have them printed or purchase a set from the shop.
In my research, I’ve tried multiple ways of applying the icons to the case, including screen printing, laser printing with ghost white toner, laser cut templates, and more. The only method I’ve found accurately recreates the decals is a process called dry transfer. This process is most often used in industrial design and product prototyping. It involves a special printer that prints high-resolution graphics with a special type of adhesive ink. The decals are applied to a surface using a burnisher and are semi-permanent until sealed (which we’ll handle next).
Fortunately, they come out incredibly well. Unfortunately, it is an expensive process. A single printed sheet can run over $100.
Even though I will be making the vector files available for download free of charge, I will also be selling individual dry transfer sheets in the shop. Each sheet will contain duplicates of the same icons in case you need to reapply during the process.
For those of you who want to try another process or have them printed yourself, the color I’ve found matches the original the best is Pantone Cool Gray 3 C.
Prepping the transfers
I’ve created the sheets to be able to apply the transfers in groups as much as possible. This will help make sure the relative location and spacing are correct.

Work one set (or icon) at a time
The best way to do this is to use a cutting mat and ruler as a guide. Use a hobby knife or scalpel to cut out only the icons you need for each application.
The transfers will come with a backing paper you can apply a small amount of pressure when the backing paper is behind, but any pressure may warp or stick the transfers to any other surface. Keep the backing paper on when cutting and right before you’re ready to apply.
Applying the decals
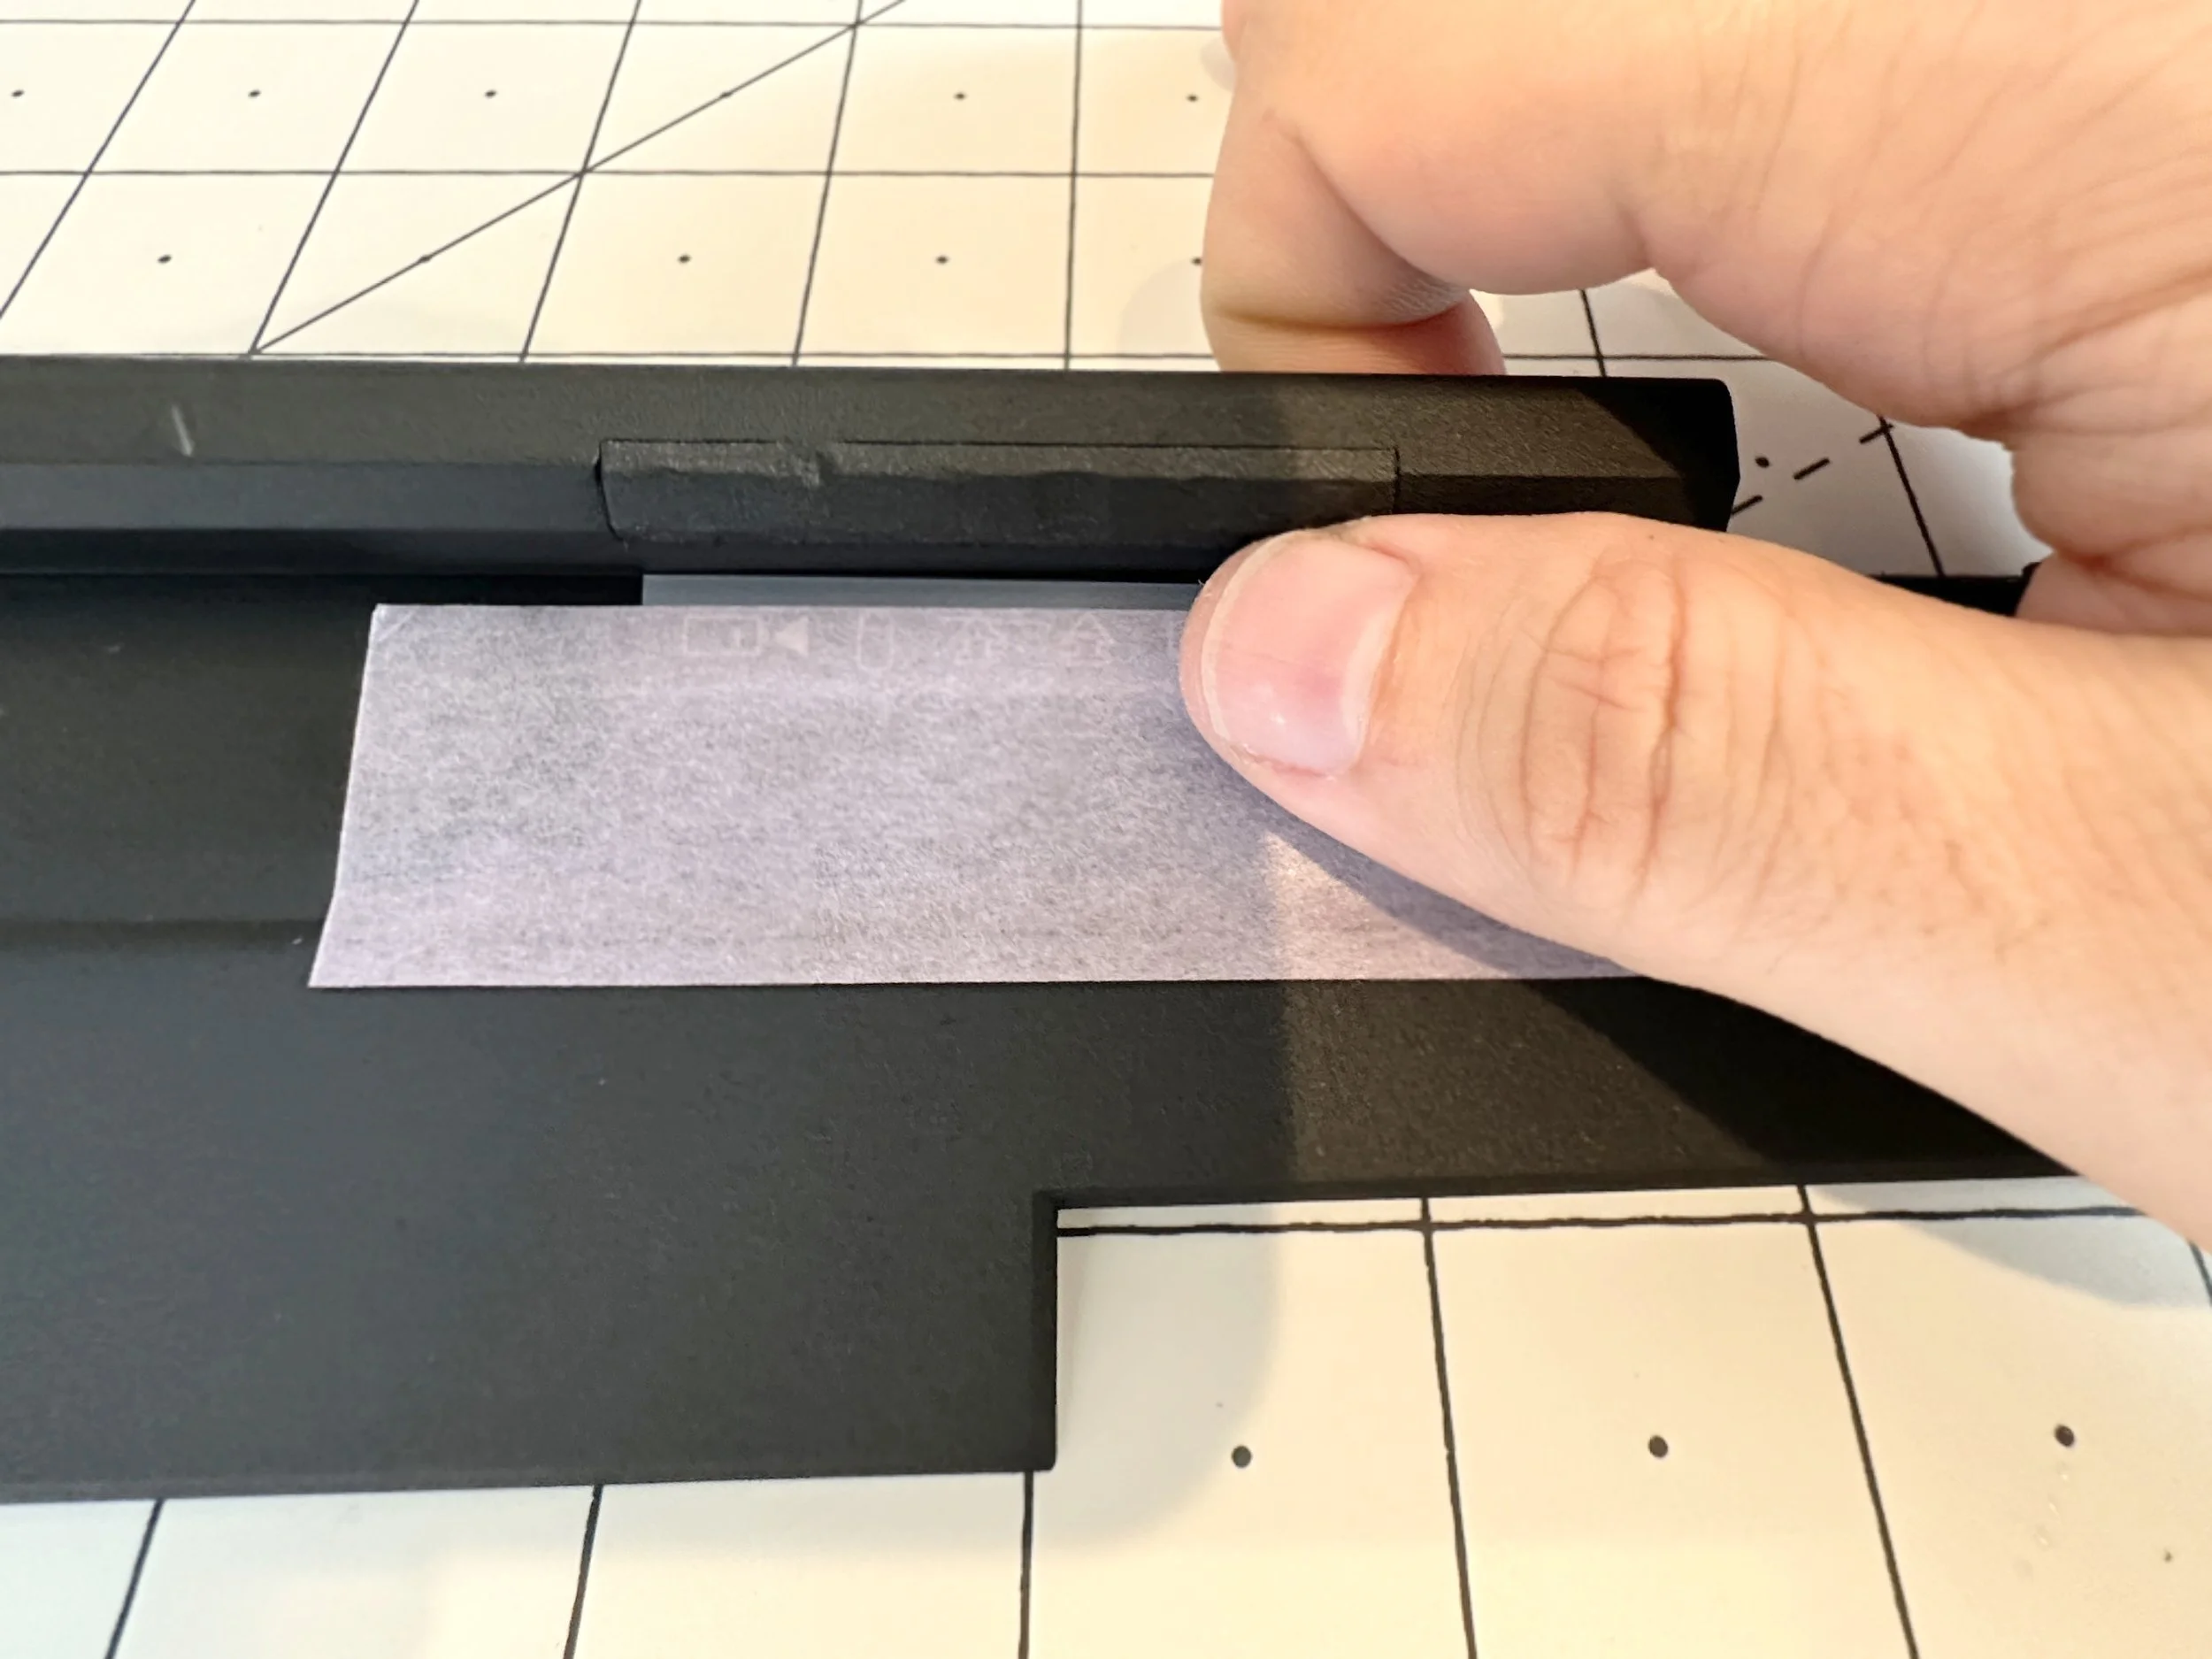
After you’ve cut out a section of decals and are ready to apply, cut a piece of masking tape (for delicate surfaces) and use the top edge of the tape to align to the top of the icons. Make sure the other 3 sides of the tape are exposed outside of the dry transfer to help secure it to the surface of the laptop.

Use references and guides
Use the top edge of the tape to help ensure the correct location and that the icons are level. Use the reference images below for placement.
Once aligned, secure the transfer
Once you have secured the icons down to the case, ensuring that it is as secure as possible, gently press down on the masking tappe and create a tight seal around the edges. You don’t want the trasnfer shifting around while you’re burnishing.

Lightly burnish
After this, use a spudger or wooden burnisher and lightly rub the surface of the icons. The amount of pressure you should use is if you are lightly shading an area with a pencil. It does not take a lot at all. Applying too much pressure will warp or distort the icons.

Test the application
After doing two passes, gently lift one side of the masking tape and see if the decals have adhered. If some of them have not, you should be able to lay the tape back down and gently burnish the parts that have not stuck.
Note: The labels will still be delicate until they’ve been sealed. Be careful not to damage the other labels while you’re applying there rest. Do not rest the parts on the surface where you’ve applied the labels.
Removing mistakes
If you make a mistake and need to remove an icon, using a higher-strength masking tape will pull the transfers right off without damaging the paint or leave residue that may prevent another application.
Warning: this is not reversible. Once a trasnfer has been removed, it can’t be re-applied!
Step 6: The Top Coat
Once you’ve added the decals, a top coat is a necessity, but there are options based on your equipment and comfort level. The first option is a 1K dead flat acrylic clear coat. This will mimic the same texture as the current paint job and will ensure the decals are sealed and give a bit more protection to the base coat. It also has UV protection to prevent fading.
Note: Only apply one or two light coats of the 1k dead flat acrylic. Applying too many or too heavy coats will make the finish more gloss than a flat.
The second option is a 2K soft-touch system that mimics the original “soft rubber” feel of the original 701C. It is more involved, more expensive, and requires either a 1mm paint gun or a 0.8mm airbrush and compressor that can put out a consistent 50 psi.
Option 1: The clear matte coat

Rust-Oleum Universal Clear Durrable Topcoat - Dead Flat
For this option, you can follow the exact same steps as above for the base coat. The paint to use would be the Rust-Oleum Universal Clear Dead Flat Durable Topcoat (302151).
The same environment and setup applies to the base coat, however you can be a bit more heavy handed with this one. Two medium coats with a little less time in-between: 5 minutes between coats should do it. Safe to handle in 1 hour, but I’d allow a full 24 hours to cure.
Option 2: Soft-touch system


Download an archived version of the Colourfox ST833 data sheet here.
The soft-touch system I found that gives the best results is the Matte Soft Touch Varnish - Anti Scratch (ST833) by the Barcelona based manufacturer Colourfox.
UPDATE: Unfortunately it looks like Colourfox is no longer making this paint. I have found a compelling alternative but full disclosure: I have not tested it: SoftTouch Pain from ALSA.
This is a multi-part system that includes the varnish, catalyst and solvent.
Recommended 1mm to 1.4mm airgun:
1 : 0.4 : 0.3
For example (by weight):
100g clear varnish (shake well)
40g catalyst (hardener)
30g solvent
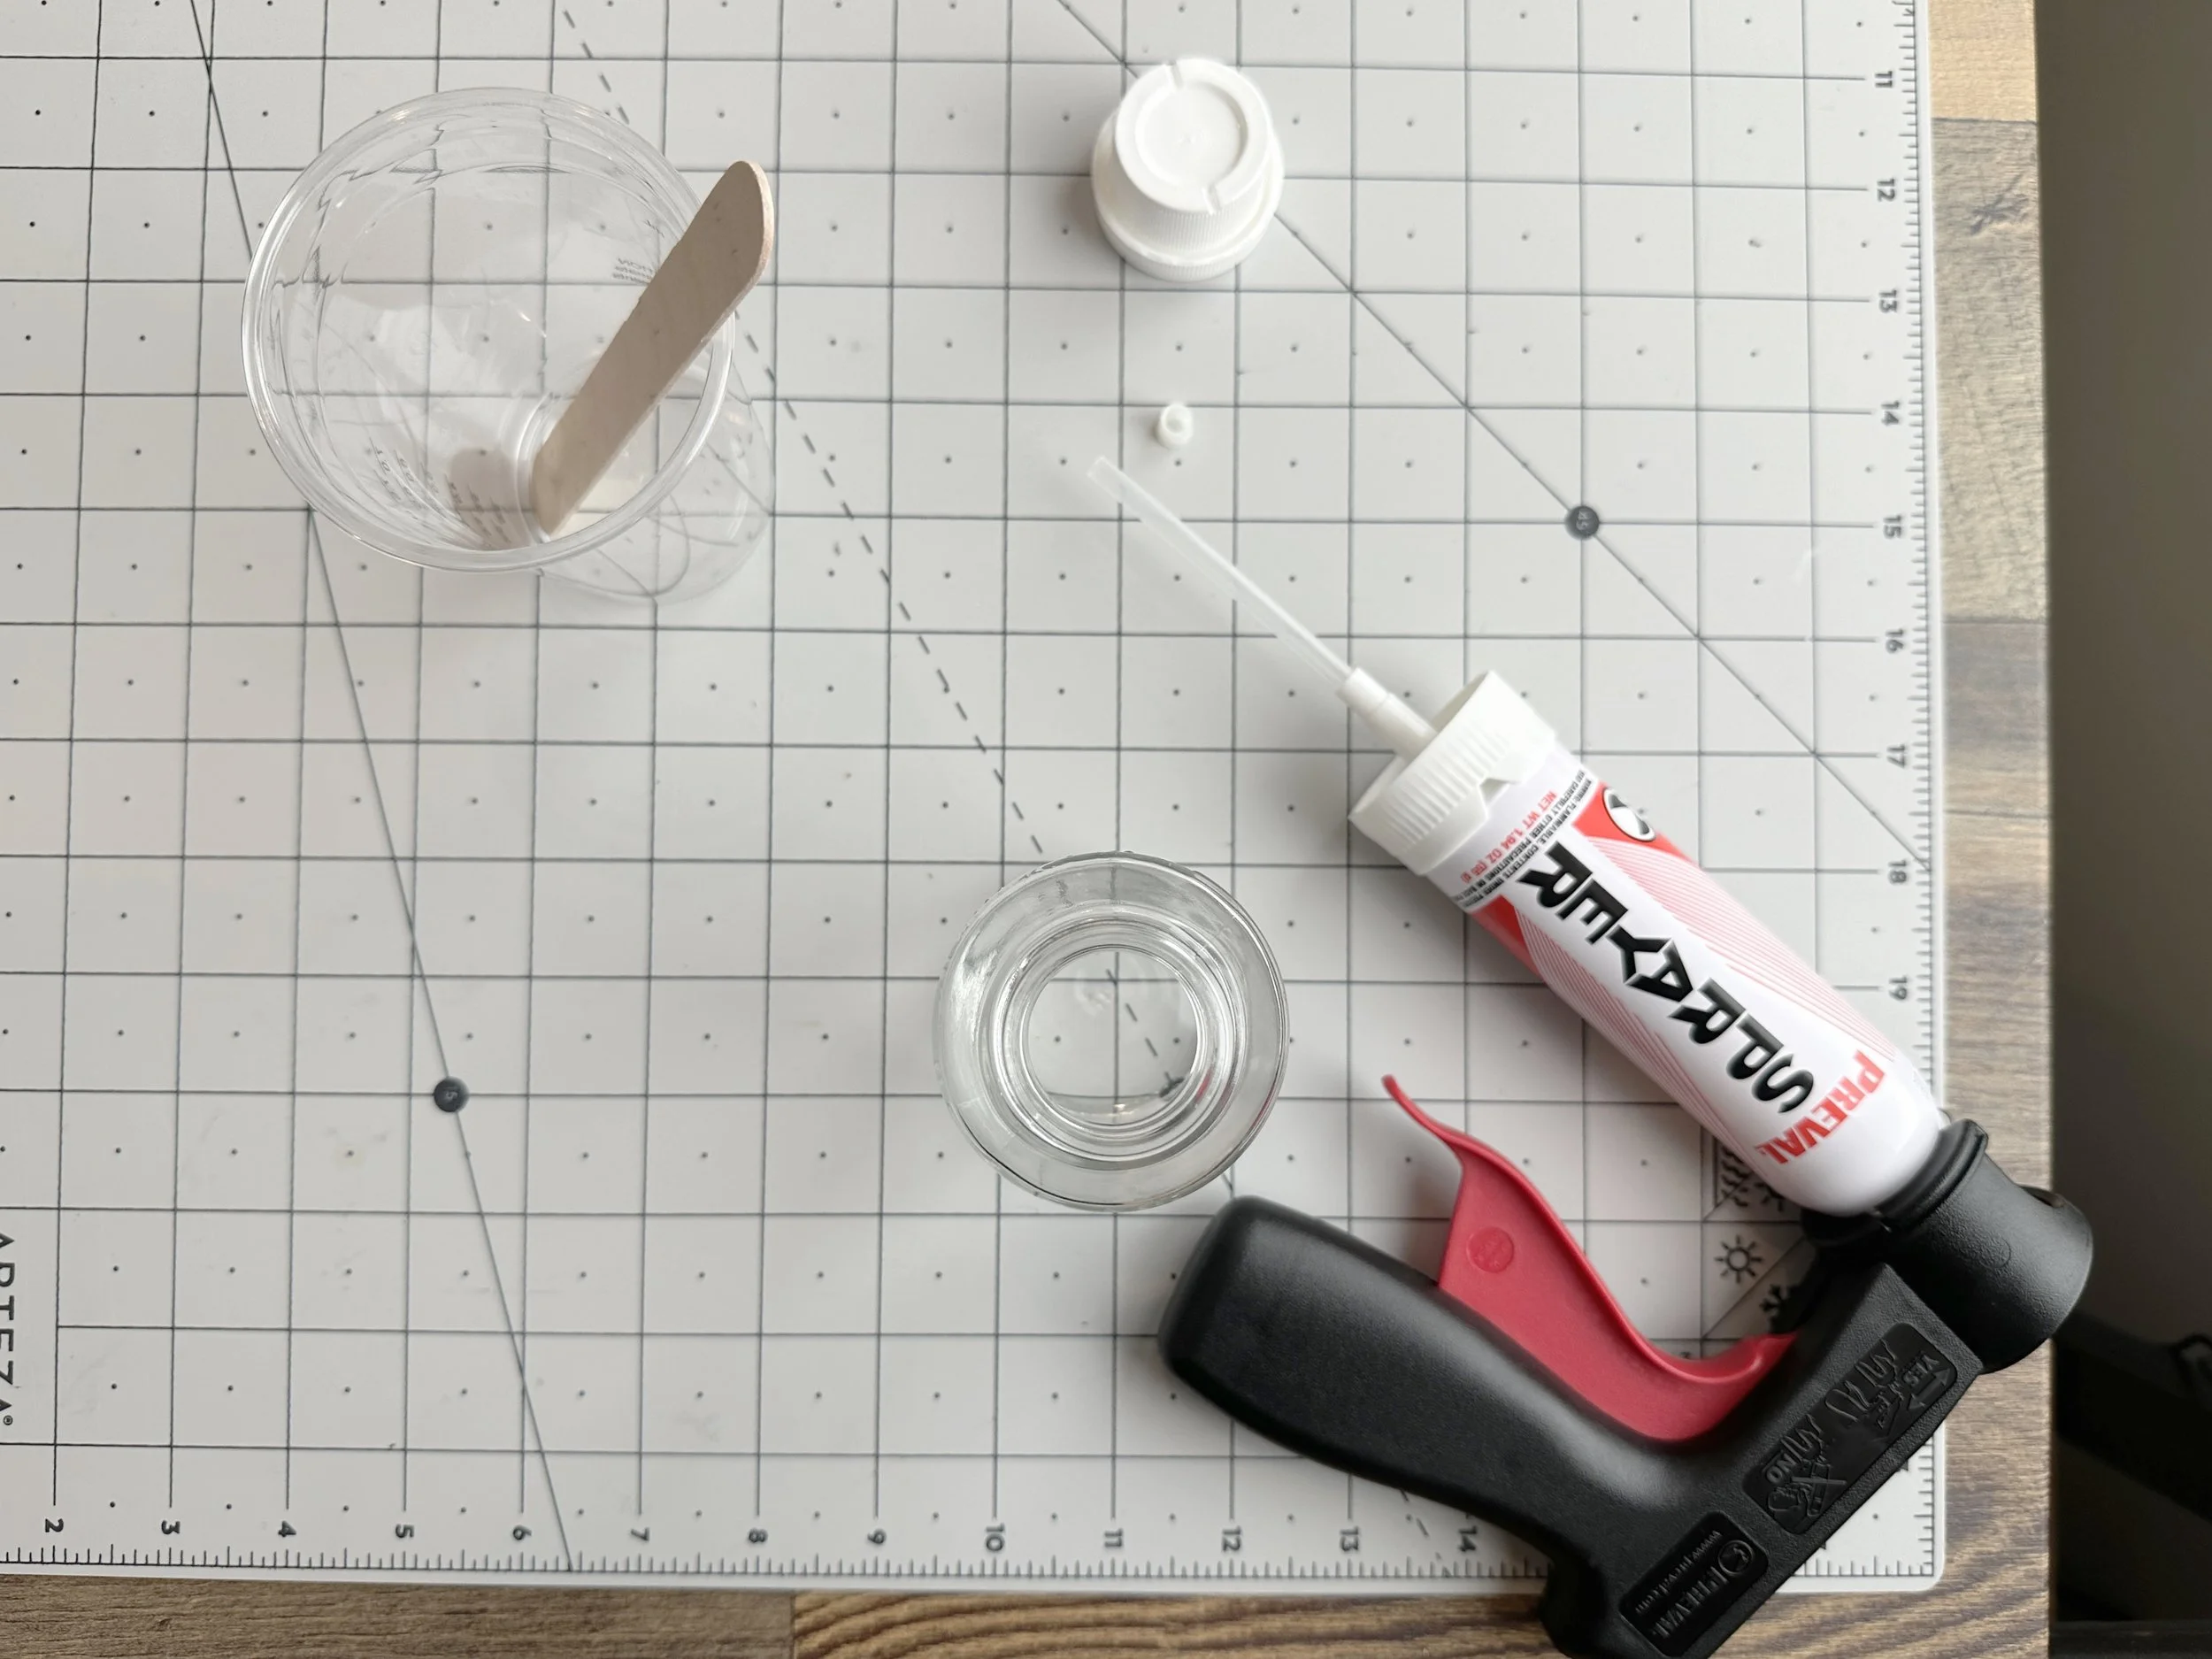
I use the Preval Spray System and have found a good mixture (increasing the solvent slightly). It is a bit looser of a mixture than you may be used to for most acrylic paints, but the results turn out great.
For a single, full 701 project my mixtures (by weight) are as follows:
2 fl oz clear varnish (shake well)
1 fl oz catalyst (hardener)
1 fl oz solvent
Your results may be different, so its always best to test your mixture first and adjust the solvent appropriately.
The Preval System can be a little tricky when you’re first getting started, but I recommend doing two things:
Remove the filter under the tube.
Prime any new canister by turning it upside down and spraying out for 10 seconds.
Never use with greater than a 45° angle.
Never shake.
Watch this video for the technique.
The manufacturer’s specs say that there is a 60-minute pot life for the mixture, but in my experience is that this system works a bit quicker. Plan on doing all of your parts at once otherwise you’ll be doing a lot of mixing and cleaning. It is recommended to apply 2 even, medium coats 5 minutes apart. The varnish is dry to the touch in 4 hours, can be handled in 6 and fully cured in 24 hours.
Note: Better to go light than heavy. Because it’s a clear varnish, it may be dificult to tell how much is going on to your parts. Do a few test sprays to dial in your airbrush on some cardboard and trust it.
Drying times:
Dry to the touch: 4 hours
Handling: 6 hours
Cured: 24 hours
Full cure (optimal hardening & scratch resistance): 48 hours
Note: It is up to you how long you wait until you re-assemble, but based on the ammount of work you just put into your paint job, I would recommend the full 48 and not take any chances.
Touch-ups & Fixes
Depending on the top-coat option you chose and the conditions in which you painted, you may run into issues with the clear coat, such as imperfections in the paint due to runs, drips, or a common issue known as “orange peel.”
Once the top coat is on, you can work to eliminate these visual defects by wet sanding with a high grit (1500+) sandpaper.
An example of an Orange Peel texture.
This can happen for a variety of reasons. Some of the most common are that your mixture doesn’t contain enough thinner, spraying at too great of an angle, or just using too much paint per pass.
This and other imperfections like water spots or debris that made it into your clear coat can be fixed with a bit of wet sanding to smooth out the surface of the clear coat.
Note: In order to make sure you’re not intefering with the curing process, only begin wet sanding after your paint has fully cured after 48 hours!
Sanding Prep
When you’re sanding, you’re taking off material in an attempt to level out the surface. Always go slow to avoid taking off too much. If you go too deep on some areas, you can always touch up with the same clear coat again, but you’ll need to go back and sand to make sure it matches the surrounding areas.
If you go too deep around the labels, it could damage them or take them off altogether. Before beginning, make sure you have the following:
1500 grit dry/wet sandpaper. Make sure the paper itself indicates it can be used for wet sanding!
A spray bottle with water. This is the best way to evenly coat the surface with a light amount of water. We’re not looking to drench it.
A microfiber cloth. The sanding process will leave behind fine white dust that is almost impossible to get off without a lint-free, absorbant cloth. Microfiber works best.
Sanding
Spray the part you’re working on with a light amount of water. Using a small piece of 1500 grit sandpaper, slowly and lightly sand the surface in a circular motion. Every minute or so wipe away the white dust with your microfiber cloth and check the surface. You should slowly begin to see the area smooth out.
Note: Be careful around the edges. Usually paint will be thinner around the edges and it will be easier to remove too much material. Start with the center surfaces first and gradually move out to the edges. You may not even need to sand the edges and corners themselves.
Done!
Whether you’ve completed a full restoration or have learned a few new tips and tricks, I hope this guide has been useful. Again, all of the decals can be downloaded for free if you’d like to try your own process, or you can purchase a set of dry transfers from the store to be used with the guide above.